A store owner I work with was shocked to learn her WordPress site was technically “selling” visitor data. She wasn’t running a shady data brokerage. She simply had Google Analytics and a Facebook Pixel installed.
However, under California’s Consumer Privacy Act (CCPA), sharing user data with these third-party services often counts as selling personal information.
If your WordPress site receives traffic from California and uses any form of tracking or advertising, you likely need a “Do Not Sell or Share My Personal Information” page. This page is a legal requirement that gives your visitors a clear way to opt out of having their data shared with third parties.
In this guide, I will walk you through how to create a CCPA-compliant “Do Not Sell” page using WPConsent. Here’s a quick overview of everything covered in this guide. Go ahead and click the links to move to your preferred section:
Disclaimer: This article provides general information about CCPA compliance and is not legal advice. For specific legal guidance, we recommend consulting with a privacy attorney.
What Is a Do Not Sell Page (And Why Does CCPA Require One)?
Most WordPress site owners think “selling data” means handing over a database in exchange for a check. That’s not how California law sees it.
Under the CCPA and its updated version, the California Privacy Rights Act (CPRA), “selling” personal information includes disclosing, sharing, or transferring user data to a third party for monetary or other valuable consideration.
That’s a much broader definition than most people expect, and it catches a lot of common WordPress setups. For example, if you run Google Analytics on your site, you’re sending visitor behavior data to Google. If you’ve installed the Facebook Pixel, you’re sharing browsing activity with Meta so they can target ads.
Since January 2023, the CPRA expanded the requirement even further. The law now covers “sharing” data for cross-context behavioral advertising, even if no money changes hands. So the official language is now “Do Not Sell or Share My Personal Information.”
So, who actually needs a CCPA Do Not Sell page?
Under the CCPA, you must comply if your business meets any one of these thresholds. Your annual gross revenue exceeds $25 million, buying, selling, or sharing personal information of 100,000 or more California consumers or households per year, or deriving 50% or more of annual revenue from selling or sharing personal data.
Now, you might be thinking your small blog or online store doesn’t hit those numbers. That might be true. But here’s something worth considering: if your site is publicly accessible (and most WordPress sites are), California residents can visit it. Several other states, including Colorado, Connecticut, and Virginia, have passed similar privacy laws with opt-out requirements.
Setting up a Do Not Sell page now is a smart way to future-proof your site and protect your visitors’ consumer rights.
Plus, the penalties for non-compliance are real. The California Attorney General or the California Privacy Protection Agency can enforce fines of $2,500 per unintentional violation and $7,500 per intentional violation. Those add up fast when each affected consumer counts as a separate violation.
What Must a CCPA Do Not Sell Page Include?
Before you jump into the setup, let’s look at what the CCPA actually requires your Do Not Sell page to have. This way, you’ll know exactly what we’re building toward.
Your CCPA Do Not Sell page must include these elements to be legally compliant:
A clear opt-out explanation at the top of the page, telling visitors why they can opt out and what steps to follow
A description of the types of personal information your site sells or shares with third parties
A web form for submitting opt-out requests (this is mandatory as one method)
At least one additional opt-out method beyond the web form, such as an email address, phone number, or mailing address
A link to your privacy policy so visitors can review your full data practices
Information about authorized agents, explaining that consumers can designate someone to submit a request on their behalf
There are also a few important rules about how the page works. You cannot require visitors to create an account just to opt out. You cannot ask them to verify their identity for opt-out requests (that’s different from data deletion requests, which can require verification).
And starting in 2026, new CCPA regulations require you to display a clear confirmation message when someone submits their opt-out request.
Your Do Not Sell page also needs to be easy to find. The law requires a clear and conspicuous link on your homepage, typically in the footer.
The link should also appear in your privacy policy and on any pages where you collect personal information. The link text should read “Do Not Sell or Share My Personal Information.”
With those requirements in mind, let’s set everything up.
Create a Do Not Sell Page in WordPress
The easiest way to set up a do not sell page is by using WPConsent. I recommend it because it handles the entire workflow: the opt-out form, request management, data storage, and even Global Privacy Control support.
WPConsent is built by the same team behind WPBeginner (the largest free WordPress resource site), trusted by over 100,000 websites, and is IAB TCF verified. The best part about the cookie consent plugin is that everything stays self-hosted on your own WordPress site, which is important for privacy compliance.
Its Do Not Sell addon gives you a dedicated opt-out form with built-in request management, all without touching a line of code. Instead of piecing together multiple plugins, custom forms, and manual processes, the addon gives you:
A ready-made opt-out form (no coding required)
Built-in request management dashboard
CSV export for compliance audit trails
Global Privacy Control (GPC) support
Everything is self-hosted on your WordPress site
Now, let’s go through all the steps you need to follow to set up a do not sell page.
Step 1: Install and Set Up WPConsent
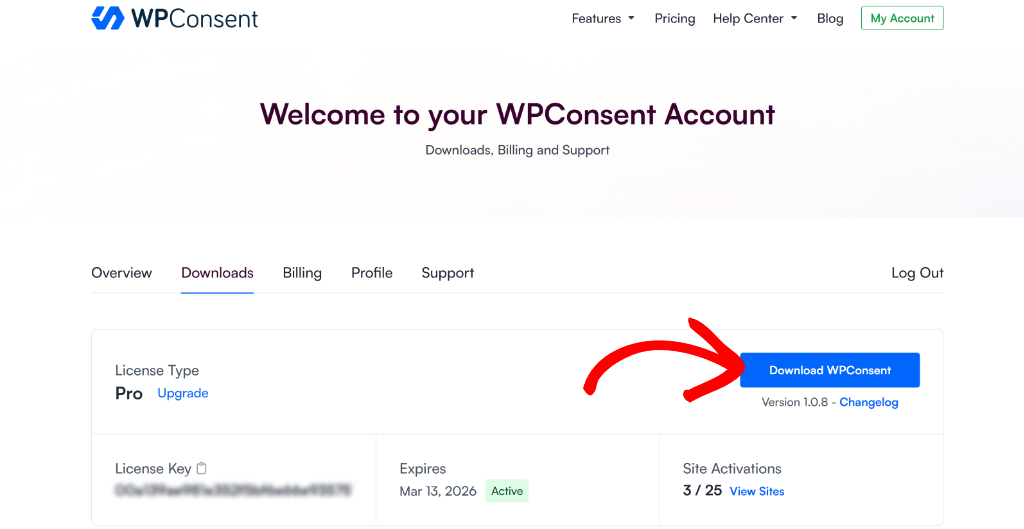
You can start by visiting the WPConsent website and signing up for an account. You’ll need the Plus plan or higher to access the Do Not Sell addon.
Once you’re logged in, go to the ‘Downloads’ tab and click the Download WPConsent button to save the plugin ZIP file to your computer.
Next, you will need to upload the plugin files to your site and install them. If you need help with this, then please see this guide on how to install a WordPress plugin.
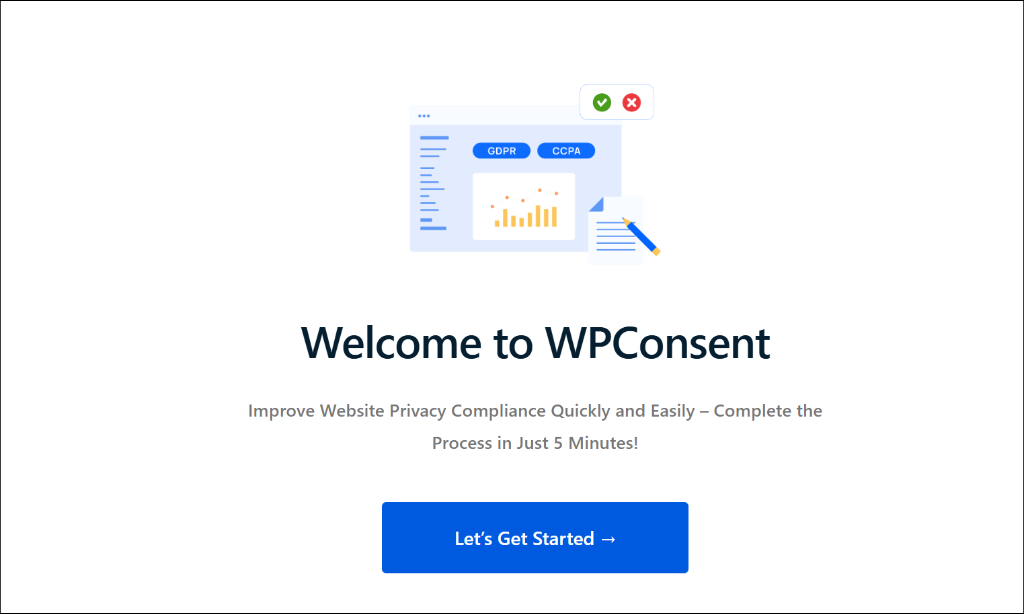
Once activated, WPConsent will launch its setup wizard. The wizard walks you through a quick cookie scan and basic configuration. Go ahead and complete it, as it sets up your cookie consent banner and script blocking, which work alongside your Do Not Sell page for full privacy compliance.
Step 2: Install the Do Not Sell Addon
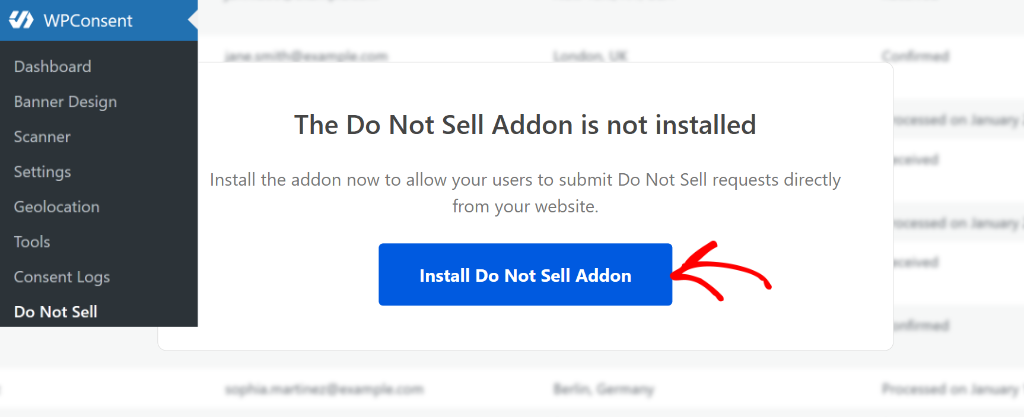
With WPConsent active, you’ll notice a “Do Not Sell” item in the WPConsent menu on the left side of your WordPress dashboard. Go ahead and click on it.
You’ll see a screen with an option to install the Do Not Sell addon. Simply click the Install Do Not Sell Addon button, and the addon will download and activate automatically in just a few seconds.
This addon is what creates the opt-out form functionality. It handles form submissions, stores requests in your local database, and gives you a management dashboard for processing them. All data stays on your own server, so nothing is sent to third-party services.
Step 3: Create Your Do Not Sell Page
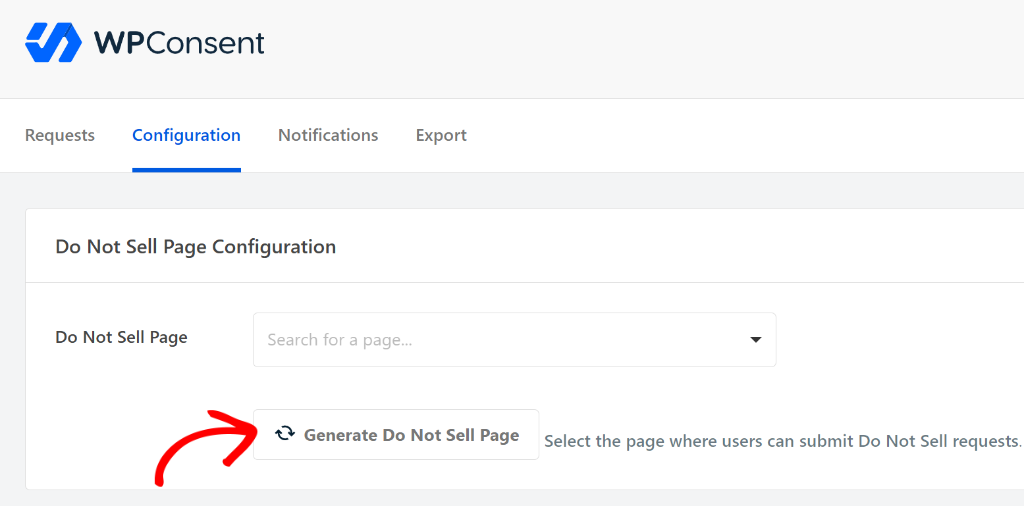
Now let’s create the actual page. After the addon installs, click on the Configuration tab. You’ll see an option to select an existing page or generate a new one.
I recommend clicking Generate Do Not Sell Page. This creates a new WordPress page with the shortcode [wpconsent_do_not_sell_form] already embedded, giving you a ready-made opt-out page in WordPress. It saves you the step of creating a page manually and adding the shortcode yourself.
If you prefer to use an existing page, you can select it from the dropdown instead. Just make sure to add the shortcode [wpconsent_do_not_sell_form] to the page content, wherever you want the form to appear.
Step 4: Configure the Opt-Out Form Fields
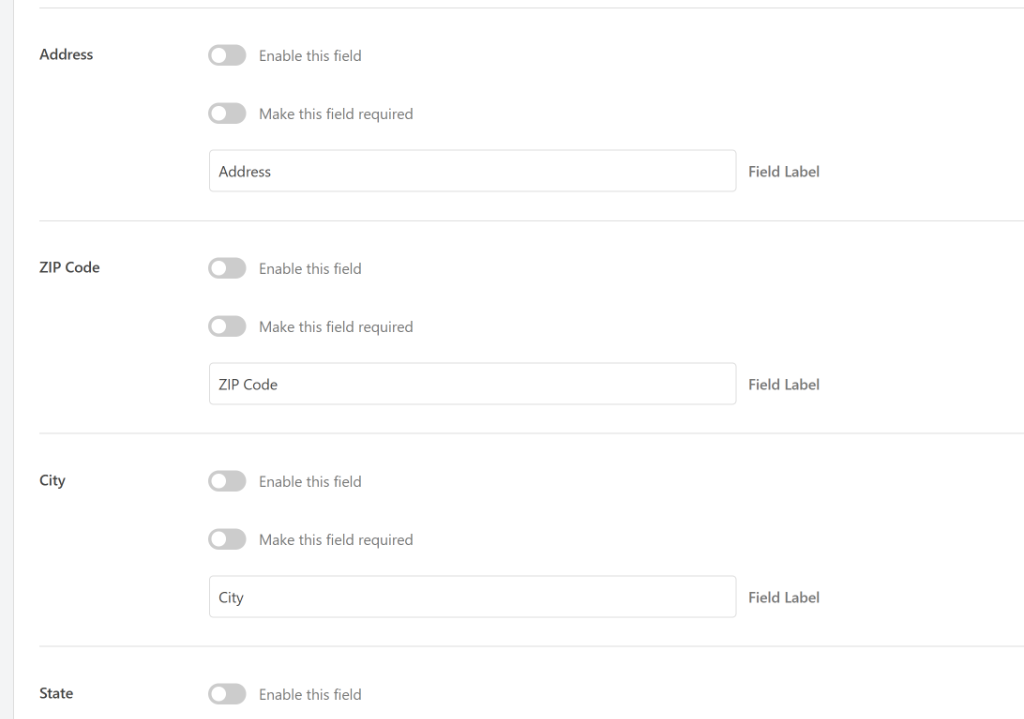
Next, you can stay on in the Configuration tab and scroll down to the form field settings. This is where you choose what information to collect from visitors who submit an opt-out request.
WPConsent requires first name, last name, and email address on every submission. These three fields are always enabled and cannot be disabled, since you’ll need them to identify and process the request.
You’ll also notice a Submit Button Text field where you can customize what the form button says. The default is “Submit Request,” which works well for most sites.
You can also enable additional optional fields like address, ZIP code, city, state, country, and phone number. Whether you need these depends on your business.
If you sell physical products and need a mailing address to match customer records, enable those fields. For most sites, the default name and email fields are sufficient.
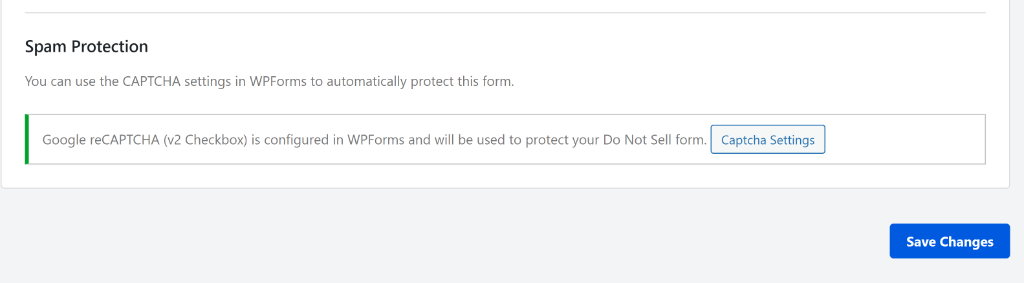
For spam protection, WPConsent offers integration through WPForms.
If you have WPForms installed on your site and have reCAPTCHA set up, then you can enable spam protection for the opt-out form to prevent bots from flooding it with fake requests.
Step 5: Add Required Page Content
With the form set up, it’s time to add the legally required content to your Do Not Sell page. Go to Pages in your WordPress dashboard and find the page WPConsent generated (or the existing page you selected).
Open it in the editor. You’ll see the form shortcode already in place. Above it, you need to add several elements to meet CCPA requirements.
Here’s a sample structure you can customize for your site:
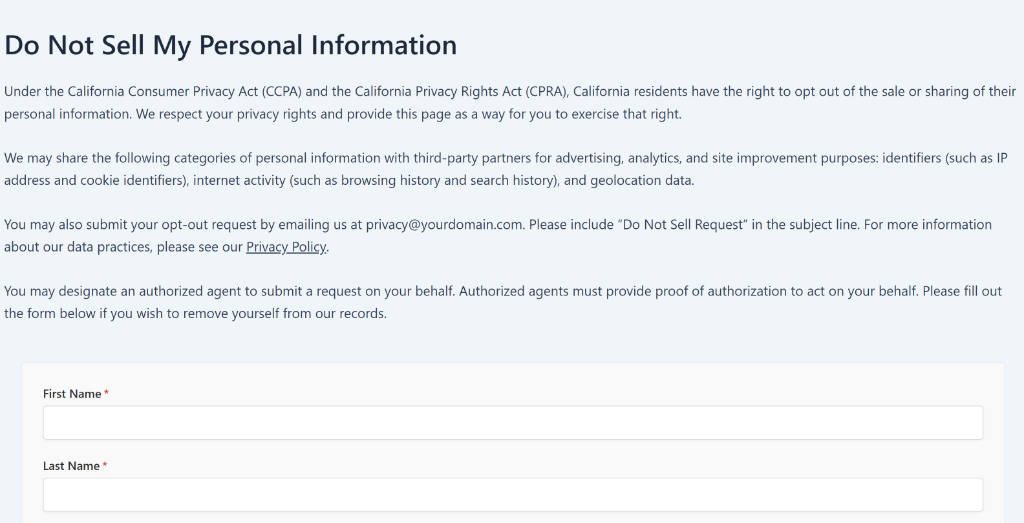
Right to Opt-Out Explanation (add at the top of the page):
Under the California Consumer Privacy Act (CCPA) and the California Privacy Rights Act (CPRA), California residents have the right to opt out of the sale or sharing of their personal information. We respect your privacy rights and provide this page as a way for you to exercise that right.
Types of Personal Information:
We may share the following categories of personal information with third-party partners for advertising, analytics, and site improvement purposes: identifiers (such as IP address and cookie identifiers), internet activity (such as browsing history and search history), and geolocation data.
Alternative Opt-Out Method:
You may also submit your opt-out request by emailing us at [email protected]. Please include “Do Not Sell Request” in the subject line.
Privacy Policy Link:
For more information about our data practices, please see our Privacy Policy.
Authorized Agent Information:
You may designate an authorized agent to submit a request on your behalf. Authorized agents must provide proof of authorization to act on your behalf.
Feel free to adjust this language to match your specific data practices. The key is that all six required elements are present on the page.
Step 6: Link the Page in Key Locations
Your Do Not Sell page needs to be easy for visitors to find. The CCPA requires a clear and conspicuous link, so let’s add it to the right places.
For instance, you can add it to the footer navigation of your site. This way, users can scroll to the bottom of a page or post and view the form.
You should also add a link to this page in your privacy policy. This way, users who go through the policy have an option to opt out using the form. You add a sentence like: “To opt out of the sale or sharing of your personal information, visit our Do Not Sell or Share My Personal Information page.”
Finally, if you have WPConsent’s cookie consent banner active, you can add a link to the Do Not Sell page within the banner itself. This is especially useful for California visitors who see the banner.
Step 7: Enable Global Privacy Control (GPC) Support
This step is one that most competing guides skip entirely, but it’s increasingly important.
Global Privacy Control (GPC) is a browser-based signal that automatically tells websites the visitor wants to opt out of data sales and sharing. Under the latest CCPA regulations, businesses must honor GPC as a valid opt-out signal.
The great news is that WPConsent supports GPC out of the box, and this feature is available even in the free version.
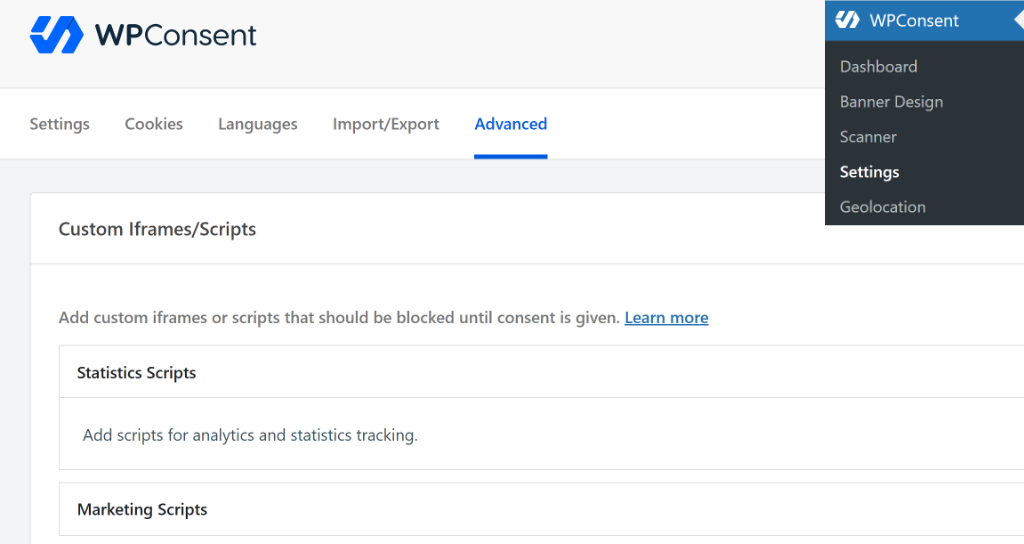
To enable it, you can head over to WPConsent » Settings from the admin panel and then click the Advanced tab.
Next, you can scroll down to the Advanced Settings section.
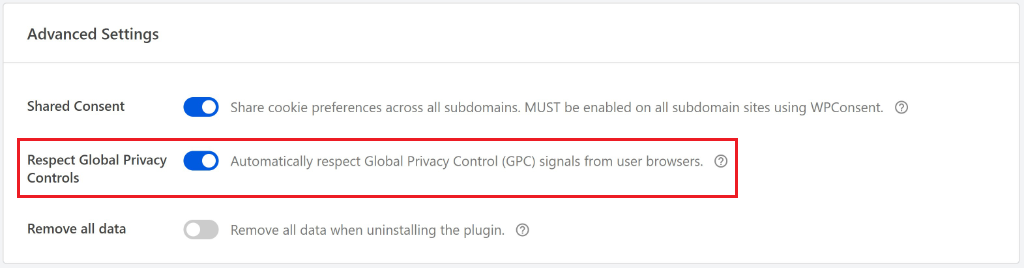
Now, look for the Respect Global Privacy Controls toggle and make sure it’s turned on.
When GPC is enabled, WPConsent automatically blocks non-essential cookies (statistics and marketing categories stay blocked), the consent banner is suppressed since the visitor has already communicated their preference, and a toast notification briefly appears confirming their GPC signal is being honored.
This works alongside your Do Not Sell page, not instead of it. GPC handles the automatic, browser-level opt-out. The Do Not Sell page handles manual opt-out requests with a form submission. Together, they cover both scenarios.
Once your page is live, you’ll start receiving opt-out requests. WPConsent makes managing do not track requests straightforward.
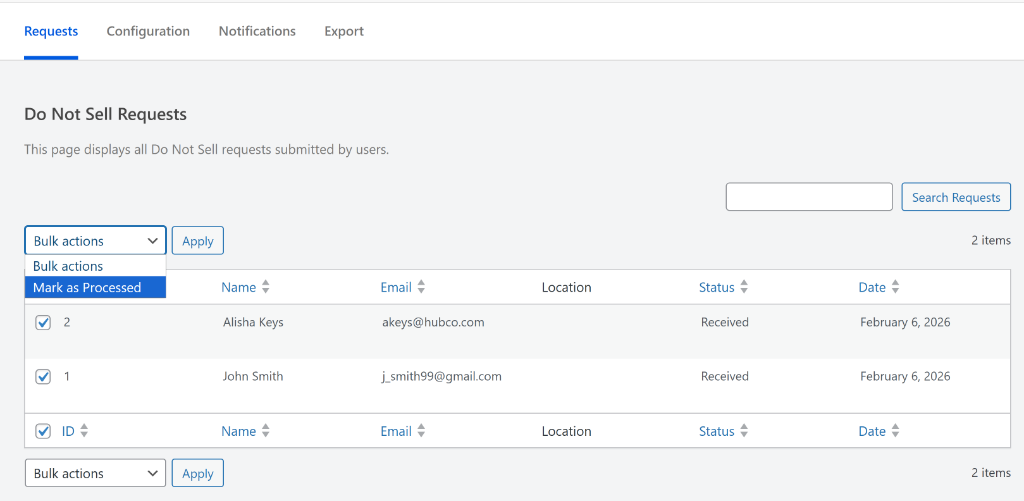
Simply head over to WPConsent, then Do Not Sell in your WordPress dashboard. You’ll see a list of all submitted requests, with each entry showing the request ID, the person’s name, email address, location, submission date, and current status.
To process a request, review the details and take the necessary actions on your end. Then mark the request as processed. You can do this individually or use the bulk action to mark multiple requests at once, which is helpful if you’re processing a batch.
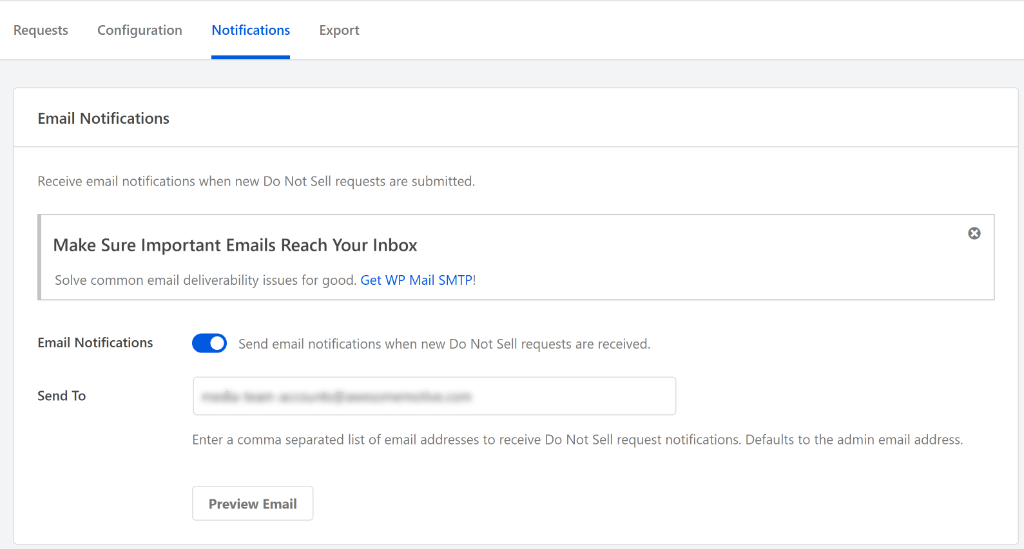
You’ll also want to set up email notifications, so you know right away when someone submits a request. Simply go to the Notifications tab in the Do Not Sell settings.
From here, toggle on email notifications and add the email addresses that should receive alerts when new requests come in. This way, you won’t miss any incoming opt-out requests.
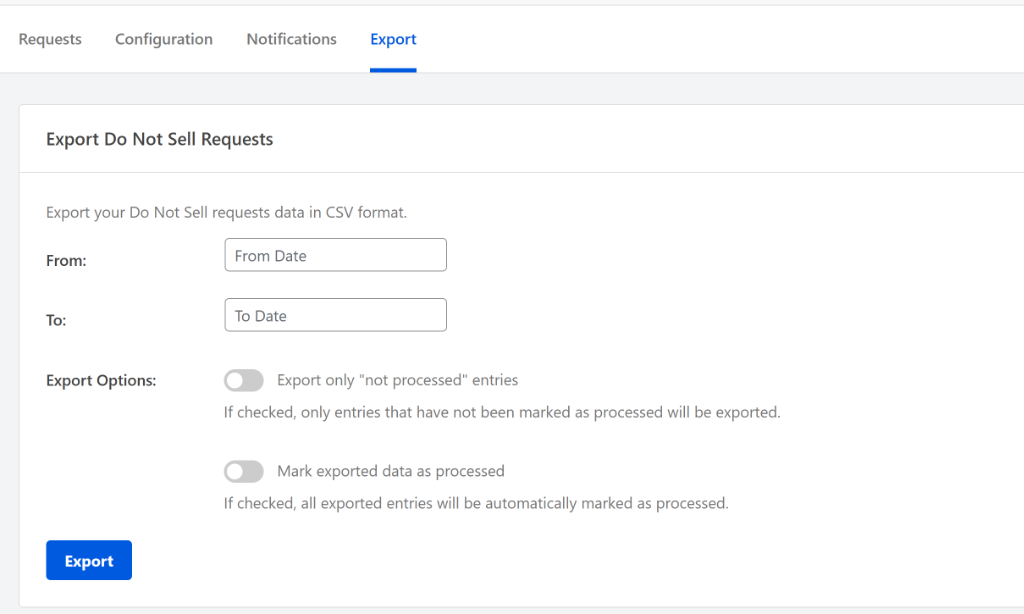
WPConsent also includes an export feature. You can click on the Export tab to access it.
You can set a date range and export all requests as a CSV file. There’s an option to export only unprocessed entries, and another to automatically mark exported entries as processed, which keeps your dashboard clean.
I recommend exporting regularly and keeping the CSV files on record, as they serve as your audit trail if you ever need to prove compliance. This built-in audit trail feature is something you would typically need a separate compliance management tool for.
All request data is stored locally in your WordPress database. Nothing gets sent to external servers, which is exactly what you want from a privacy perspective.
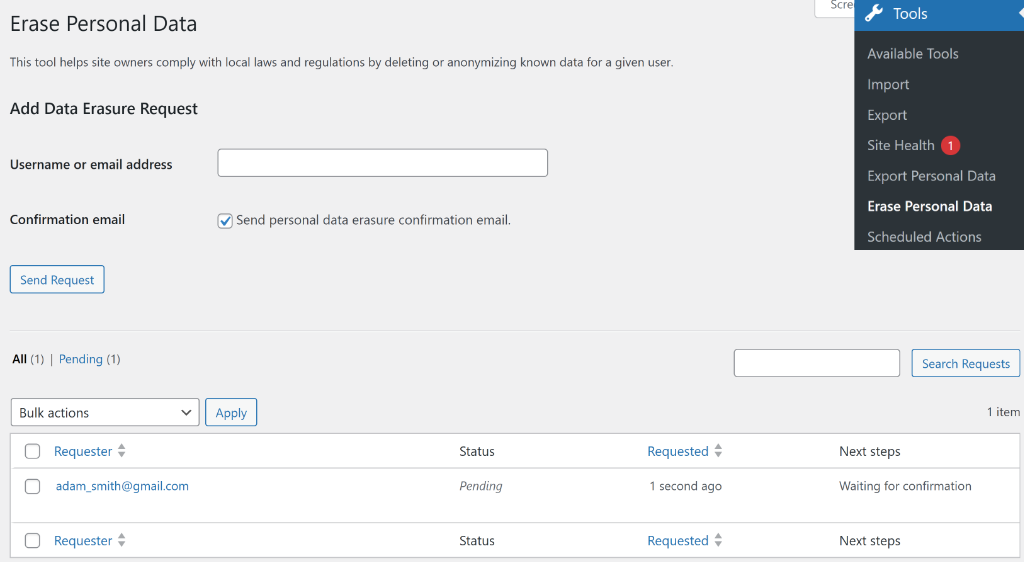
Pro Tip: WordPress also has a built-in personal data erasure tool under Tools » Erase Personal Data. If a consumer requests full data deletion (which is a separate right under CCPA), you can use this alongside WPConsent’s request management.
What to Do After Receiving an Opt-Out Request
Getting the request is just the first step. Here’s the workflow you should follow to stay compliant:
1. Confirm receipt immediately. Send an acknowledgment to the consumer letting them know you’ve received their request. This can be an automated email or a manual response.
2. Process within 15 business days. The CCPA gives you 15 business days to stop selling or sharing the consumer’s personal information. This means disabling any tracking or data sharing associated with that individual.
3. Notify third parties. If you’ve shared the consumer’s data with any third parties (including data brokers) in the past 90 days, you need to notify those parties about the opt-out. This might include your advertising partners, analytics providers, or data brokers.
4. Update your records. Document the opt-out in your compliance records. WPConsent’s export feature makes this easy. Keep a record of when the request was received, when it was processed, and what actions you took.
5. Respect the opt-out for at least 12 months. You cannot ask the consumer to re-authorize data sales for at least 12 months from the date of their request.
One important note: unlike data access or deletion requests, the CCPA specifically says you cannot require identity verification for opt-out requests. If someone fills out the form, you process it. You also can’t require them to create an account.
Do Not Sell Page Compliance Checklist
Before running through this checklist, you may want to audit your WordPress site for cookie compliance to identify all the cookies and scripts your site currently uses.
Here’s a quick checklist you can use to make sure everything is in order:
Do Not Sell page created with an opt-out web form
Right to opt-out explanation included at the top of the page
Types of personal information subject to sale/sharing are described
At least one alternative opt-out method is listed (email, phone, or mail)
Link to your privacy policy on the page
Authorized agent information included
“Do Not Sell or Share My Personal Information” link in your site footer
Link added to your privacy policy
Link placed on any pages that collect personal information
Global Privacy Control (GPC) enabled in WPConsent
Confirmation message displayed when opt-out is submitted (2026 requirement)
Spam protection is enabled on the form
Email notifications are configured for new requests
Request management workflow documented
Third-party notification process established
Exporting and record-keeping process in place
FAQs about Do Not Sell Pages in WordPress
1. What is a “Do Not Sell My Personal Information” page?
It’s a page required by the California Consumer Privacy Act (CCPA) that gives visitors a way to opt out of having their personal data sold or shared with third parties. The page must include a web form, an alternative opt-out method, and links to your privacy policy.
2. Does my WordPress site need a Do Not Sell page?
You need one if you sell or share personal information of California residents and meet at least one CCPA threshold: $25 million or more in annual revenue, data from 100,000 or more California consumers, or 50% or more of your revenue from selling data. If you use Google Analytics, Facebook Pixel, or ad networks, you may be “selling” data without realizing it.
3. Does “selling” data just mean selling it for money?
No. Under the CCPA and CPRA, “selling” includes sharing data for any valuable consideration, not just cash. Running targeted advertising, sharing browsing data with analytics platforms, or providing user data to ad networks all qualify, even when no money directly changes hands.
4. What is Global Privacy Control (GPC), and do I still need a Do Not Sell page?
GPC is a browser-based signal that automatically communicates a visitor’s opt-out preference to websites. Under CCPA, businesses must honor it as a valid opt-out. However, GPC does not replace the need for a Do Not Sell page because not all browsers support it, and some visitors prefer to submit a manual request.
5. What are the penalties for not having a Do Not Sell page?
The California Attorney General and the California Privacy Protection Agency can enforce fines of $2,500 per unintentional violation and $7,500 per intentional violation. Each affected consumer can count as a separate violation, so fines can add up quickly.
6. How long do I have to process a Do Not Sell request?
You must confirm receipt immediately and complete processing within 15 business days. The opt-out must be respected for at least 12 months before you can ask the consumer to reconsider.
7. Do I need a Do Not Sell page if my business is not in California?
Your business location doesn’t matter. If you serve California residents and meet the CCPA thresholds, you must comply. Since most websites are accessible to anyone in the United States, this effectively applies to many WordPress site owners nationwide.
8. How is a Do Not Sell page different from a cookie consent banner?
A cookie consent banner asks for permission before setting cookies, which is primarily required by the GDPR for European visitors. A Do Not Sell page provides an opt-out mechanism for data sales and sharing, which is required by the CCPA for California visitors. They address different legal requirements, but many sites need both. WPConsent handles both scenarios from a single plugin. If you’re new to this topic, start with our guide on what cookie consent is and why it matters.
Creating your Do Not Sell page is an important step toward complete privacy compliance.
Websites store cookies to enhance functionality and personalise your experience. You can manage your preferences, but blocking some cookies may impact site performance and services.
Essential cookies enable basic functions and are necessary for the proper function of the website.
Name
Description
Duration
Cookie Preferences
This cookie is used to store the user's cookie consent preferences.
30 days
free-pricing
Used to update the pricing page URL based on the visitor's landing for consistency.
Session
CloudFlare provides web performance and security solutions, enhancing site speed and protecting against threats.
Used by the content network, Cloudflare, to identify trusted web traffic.
session
__cf_bm
Cloudflare's bot products identify and mitigate automated traffic to protect your site from bad bots. Cloudflare places the __cf_bm cookie on End User devices that access Customer sites that are protected by Bot Management or Bot Fight Mode. The __cf_bm cookie is necessary for the proper functioning of these bot solutions.
session
__cflb
When enabling session affinity with Cloudflare Load Balancer, Cloudflare sets a __cflb cookie with a unique value on the first response to the requesting client. Cloudflare routes future requests to the same origin, optimizing network resource usage. In the event of a failover, Cloudflare sets a new __cflb cookie to direct future requests to the failover pool.
session
_cfuvid
The _cfuvid cookie is only set when a site uses this option in a Rate Limiting Rule, and is only used to allow the Cloudflare WAF to distinguish individual users who share the same IP address.
session
cf_clearance
Whether a CAPTCHA or Javascript challenge has been solved.
session
__cfseq
Sequence rules uses cookies to track the order of requests a user has made and the time between requests and makes them available via Cloudflare Rules. This allows you to write rules that match valid or invalid sequences. The specific cookies used to validate sequences are called sequence cookies.
session
cf_ob_info
The cf_ob_info cookie provides information on: The HTTP Status Code returned by the origin web server. The Ray ID of the original failed request. The data center serving the traffic
session
cf_use_ob
The cf_use_ob cookie informs Cloudflare to fetch the requested resource from the Always Online cache on the designated port. Applicable values are: 0, 80, and 443. The cf_ob_info and cf_use_ob cookies are persistent cookies that expire after 30 seconds.
session
__cfwaitingroom
The __cfwaitingroom cookie is only used to track visitors that access a waiting room enabled host and path combination for a zone. Visitors using a browser that does not accept cookies cannot visit the host and path combination while the waiting room is active.
session
cf_chl_rc_i
These cookies are for internal use which allows Cloudflare to identify production issues on clients.
session
cf_chl_rc_ni
These cookies are for internal use which allows Cloudflare to identify production issues on clients.
session
cf_chl_rc_m
These cookies are for internal use which allows Cloudflare to identify production issues on clients.
session
These cookies are needed for adding comments on this website.
Name
Description
Duration
comment_author
Used to track the user across multiple sessions.
Session
comment_author_email
Used to track the user across multiple sessions.
Session
comment_author_url
Used to track the user across multiple sessions.
Session
Easy Digital Downloads is a complete eCommerce solution for WordPress.
Name
Description
Duration
edd_items_in_cart
Stores information about the cart.
Session
edd_session_
Stores information about the current user session.
Session
These cookies are used for managing login functionality on this website.
Name
Description
Duration
wordpress_test_cookie
Used to determine if cookies are enabled.
Session
wordpress_logged_in
Used to store logged-in users.
Persistent
wordpress_sec
Used to track the user across multiple sessions.
15 days
Stripe is a payment processing platform that enables businesses to accept online payments securely and efficiently.
Contains information related to marketing campaigns of the user. These are shared with Google AdWords / Google Ads when the Google Ads and Google Analytics accounts are linked together.
90 days
__utmx
Used to determine whether a user is included in an A / B or Multivariate test.
18 months
_gali
Used by Google Analytics to determine which links on a page are being clicked
30 seconds
_ga_
ID used to identify users
2 years
_ga
Used to distinguish users.
2 years
_gat
Used to throttle request rate.
1 minute
_gid
Used to distinguish users.
24 hours
__utma
Used to distinguish users.
Persistent
__utmb
Used to determine new sessions/visits.
30 minutes
__utmc
Used to determine if the user is in a new session/visit.
Session
__utmt
Used to throttle request rate.
10 minutes
__utmv
Used to store visitor-level custom variable data.
2 years
__utmz
Stores the traffic source or campaign that explains how the user reached your site.
6 months
Clarity is a web analytics service that tracks and reports website traffic.