Managing Do Not Sell requests in WordPress is more complicated than most website owners realize. When I first encountered this challenge, I assumed it would be a simple setting somewhere in the WordPress dashboard. I was completely wrong.
Sadly, WordPress doesn’t have built-in functionality to handle any of these Do Not Sell scenarios.
Your analytics plugins, social media widgets, and advertising scripts all run independently. Each one needs to be configured separately to detect and respect these different types of requests.
This is where WPConsent can help you out. It offers a powerful Do Not Sell addon that makes it effortless to manage DNT requests and comply with privacy regulations like CCPA.
In this article, I’ll show you how to handle Do Not Sell requests in WordPress using WPConsent.
Why You Need to Handle Do Not Sell Requests?
Your website visitors are becoming more privacy-conscious every day. They’re enabling Do Not Track settings in their browsers, updating cookie preferences, and even sending direct requests to stop tracking their activity.
Privacy regulations like the California Consumer Privacy Act (CCPA) provide users the right to request companies to not sell or share their personal information with third parties.
Failing to honor these requests can lead to compliance issues and potential fines. Similarly, when your site ignores these requests, you’re breaking trust before visitors even engage with your content.
As a result, businesses need to provide users with clear ways to opt out of data collection. One way to do that is by offering users a simple way of submitting their Do Not Sell requests using a form, and website owners can then process their data for removal.
That said, let’s look at how you can do that on your WordPress website.
Managing Do Not Sell Requests in WordPress
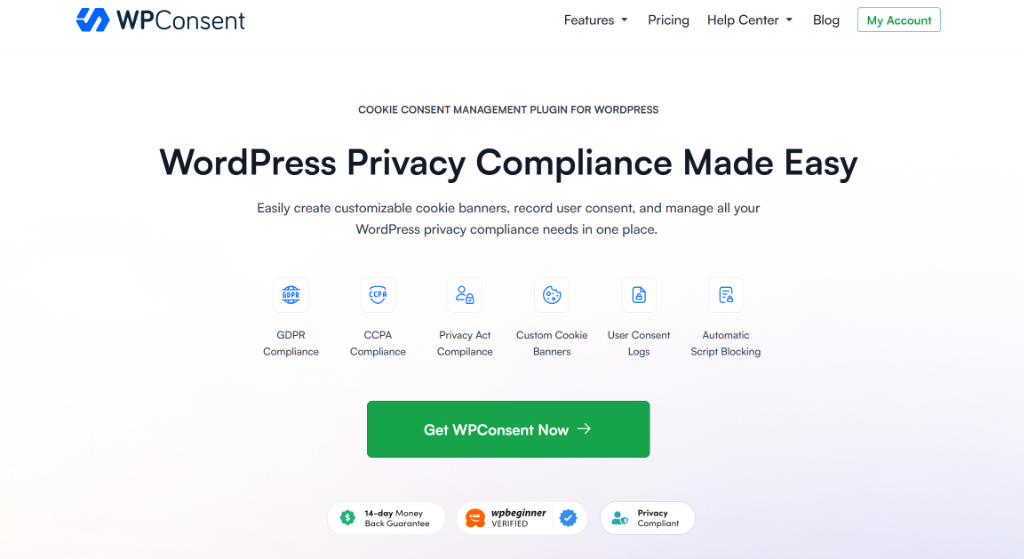
The easiest way to manage Do Not Sell requests in WordPress is by using WPConsent. It is the best cookie consent management plugin for WordPress and offers a powerful Do Not Sell addon (which was previously named as Do Not Track addon).
Using the addon, you can provide your visitors with a dedicated page, where they can submit their opt-out request quickly and easily. Besides that, you can add a customizable form and define the form fields and labels. The addon also lets you manage all the requests in one place, so you can quickly process them.
The best part is that all the requests are stored locally in a custom table on your own site, ensuring you maintain full control over your data. It offers multilingual compatibility that helps you translate the DNT form on the frontend of your website.
Note: To get started, you will need theWPConsent Plus or higher plans because they include the Do Not Sell addon. However, there is also a WPConsent Lite version that’s available for free, but it doesn’t offer the addon.
Now, let’s look at the steps to set up WPConsent, the addon, and handle Do Not Sell Requests in WordPress.
Step 1: Install and Activate WPConsent in WordPress
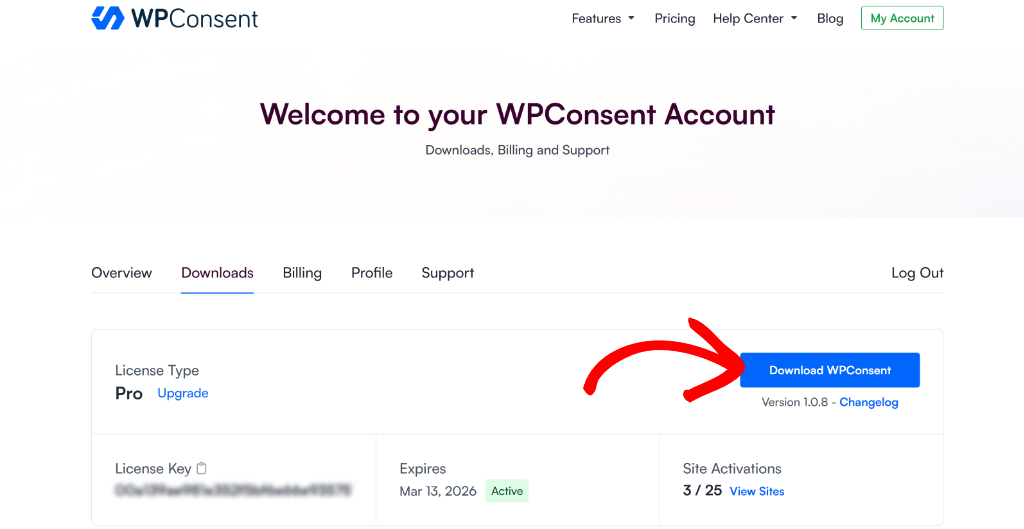
First, you’ll need to visit the WPConsent website and sign up for a new account.
After that, you can head to your WPConsent account area and go to the ‘Downloads’ tab.
From here, go ahead and click the Download WPConsent button and save the plugin ZIP files on your computer.
Next, you can log into your WordPress website and upload the plugin files to install and activate the WPConsent plugin. If you need help, then please see this guide on how to install a WordPress plugin.
Upon activation, you’ll see the WPConsent setup wizard. Go ahead and click the ‘Let’s Get Started’ button and follow the onscreen instructions.
Step 2: Download and Install Do Not Sell Addon
Now that you’ve set up WPConsent, the next step is to add the Do Not Sell addon.
First, you’ll need to go to WPConsent » Do Not Sell from the WordPress admin panel.
From here, simply click the ‘Install Do Not Sell Addon’ button.
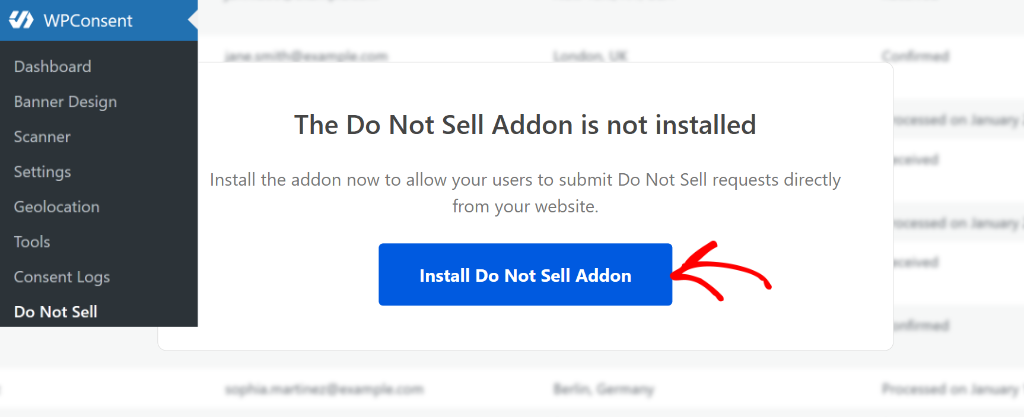
Once that’s done, the addon will automatically install and activate.
Now, let’s see how you can configure the addon to handle Do Not Sell requests in WordPress.
Step 3: Configure the Do Not Sell Addon in WPConsent
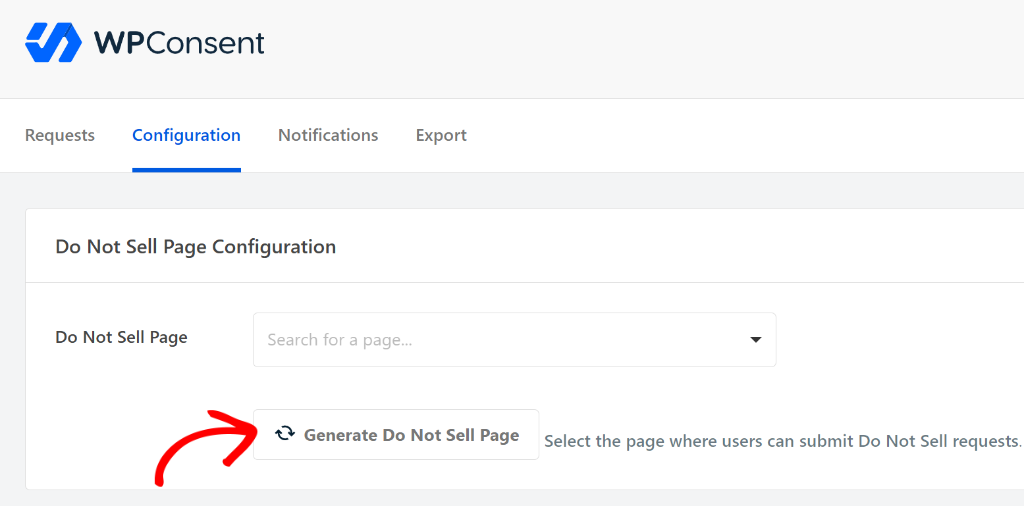
Once the addon is active, you can head to WPConsent » Do Not Sell from the WordPress admin panel and switch to the ‘Configuration’ tab.
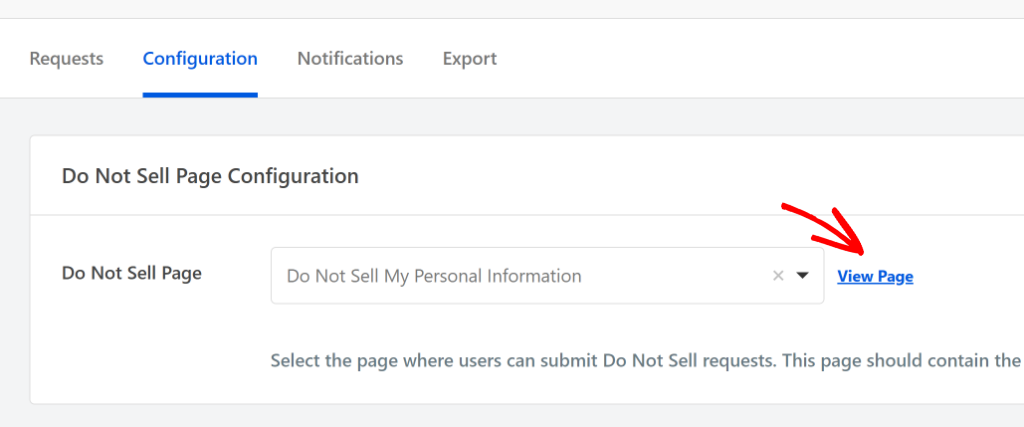
Here, you can configure a page where users can submit their Do Not Sell requests. If you want to select an existing page, then you can click the dropdown menu and choose a page.
On the other hand, WPConsent also lets you create a new page to handle requests. Go ahead and click the Generate Do Not Sell Page button.
After that, you can scroll down and customize the form fields.
For instance, you can change the text of each field label and enable a different field to display in the form. There is also an option to make the fields required, so users will have to fill them out before submitting the request.

By default, the form will show the first name, last name, and email fields enabled. However, you can add more fields, such as address, ZIP code, city, country, and phone.
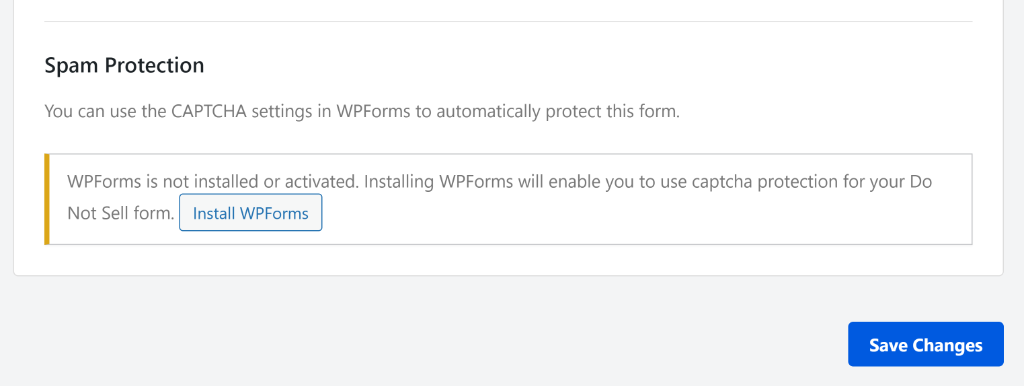
The WPConsent Do Not Sell addon also integrates with WPForms for spam protection, giving you access to their three advanced CAPTCHA options:
- Google reCAPTCHA
- hCaptcha
- Cloudflare Turnstile
This anti-spam feature helps you protect your website from spam and abuse while letting real people pass through with ease.
Once you’ve made the changes, go ahead and click the Save Changes button.
Now, you can scroll to the top and click the ‘View Page’ button.
Next, you will see a preview of the form that your users will use to submit the requests.
You can then quickly make changes to the DNS form, add or remove form fields, and more.

Step 4: Manage Do Not Sell Requests
Once the form is live on your website, users can use it to request the removal of their information from your site.
To handle all the requests, simply switch to the Requests tab in the Do Not Sell addon. From here, simply select the requests by clicking the checkbox next to them.
After that, go ahead and click the Bulk Action dropdown and select the ‘Mark as Processed’ option. Once that’s done, you can click the Apply button.
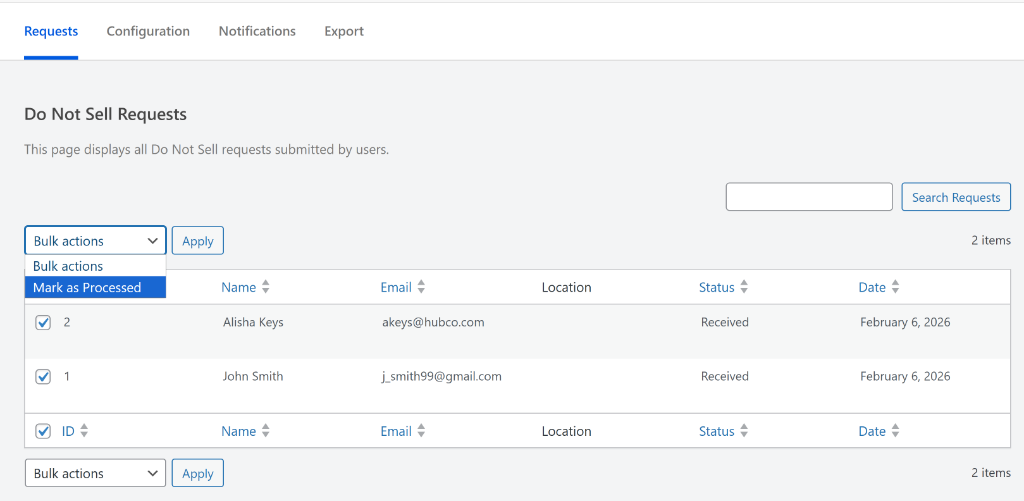
The best part is that the addon automatically timestamps each submission and allows you to track when the request was made and processed, simplifying your data audits.
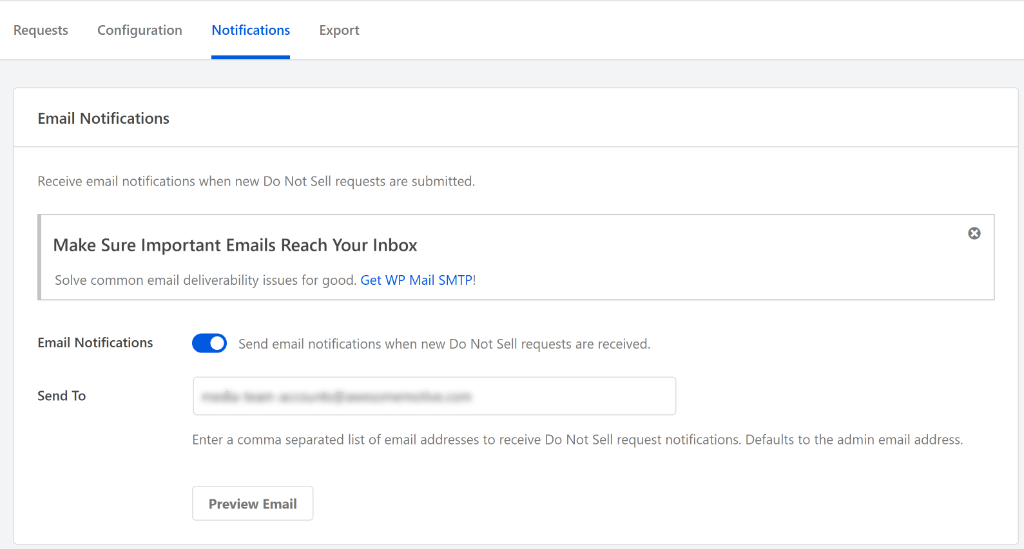
You can also set up email notifications with the Do Not Sell addon. This allows you to get instant notifications when a user submits a request.
To set this up, simply head to the ‘Notification’ tab. Here, you can enter the email address under the ‘Send To’ field. There is also an option to preview the email that you’ll receive in your inbox.
WPConsent also lets you export the Do Not Sell requests on your site.
Simply switch to the ‘Export’ tab and then pick a date range to export the requests.
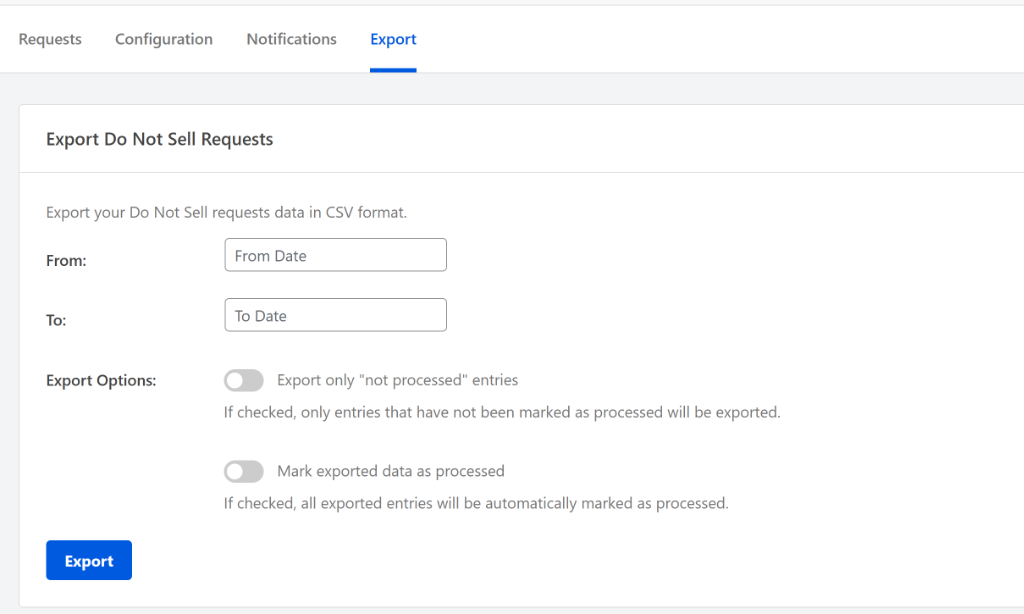
The addon will also give you the option to automatically mark exported entries as ‘processed’ to streamline your workflow, or only export ‘not processed’ entries.
That’s it! You’ve successfully set up a system to handle Do Not Sell requests in WordPress using WPConsent.
FAQs about Handling Do Not Sell Requests in WordPress
Let’s look at some common questions users might have about Do Not Sell requests in WordPress.
1. What exactly is a Do Not Track request?
Do Not Track (DNT) or Do Not Sell (DNS) request is a signal indicating that users don’t want to be tracked by websites. It’s basically their way of saying, ‘please don’t collect data about my behavior.’
2. Does WordPress automatically respect Do Not Sell signals?
No, WordPress doesn’t have built-in functionality to detect or respect DNT signals. Your analytics plugins, social media widgets, and other tracking scripts will continue running regardless of a user’s DNT preference unless you specifically configure them to stop. This is where you can use WPConsent to handle Do Not Sell requests.
3. What’s the difference between DNT and cookie consent banners?
Cookie consent banners ask users to make a choice about tracking when they visit your site. DNT signals should be respected automatically without showing any banners. When someone has DNT enabled, they’ve already told you their preference and that you shouldn’t ask them again. However, most websites still track users, so a better way to handle this is by using WPConsent. It lets you create a custom DNT form where users can submit their requests.
I hope this article helped you learn how to handle Do Not Sell requests in WordPress. You may also want to see our guide on how to manage cookie consent data in WordPress and how to block cookies on your WordPress website.
If you liked this article, then please follow us on X (formerly known as Twitter). You can also leave a comment below if you need any assistance.