
Would you like a privacy policy, cookie policy, and Do Not Sell page that match what your site actually does?
In this guide, we’ll walk you through creating and publishing your legal documents with WPConsent Legal Documents.
All you need is WPConsent and about 15 minutes to answer questions about your business.
Requirements: Legal Documents requires a Plus license level or higher.
Table of contents
- Starting the Legal Documents Tool
- Answering the Questions
- Reviewing and Publishing Your Documents
- Keeping Your Documents Up to Date
- Frequently Asked Questions
Before you get started, make sure WPConsent is installed and activated on your WordPress site.
Starting the Legal Documents Tool
To get started, we’ll open the Legal Documents tool and confirm it covers your type of site.
Legal Documents writes your documents from 2 sources: your site scan and your answers to a short questionnaire. It covers GDPR and ePrivacy (EU and EEA), UK GDPR and PECR (United Kingdom), and CCPA and CPRA (California).
From your WordPress admin sidebar, go to WPConsent » Legal Documents.
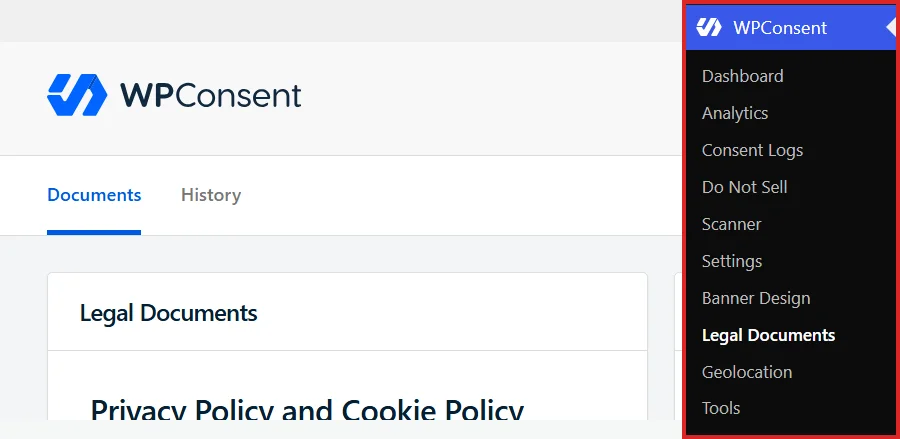
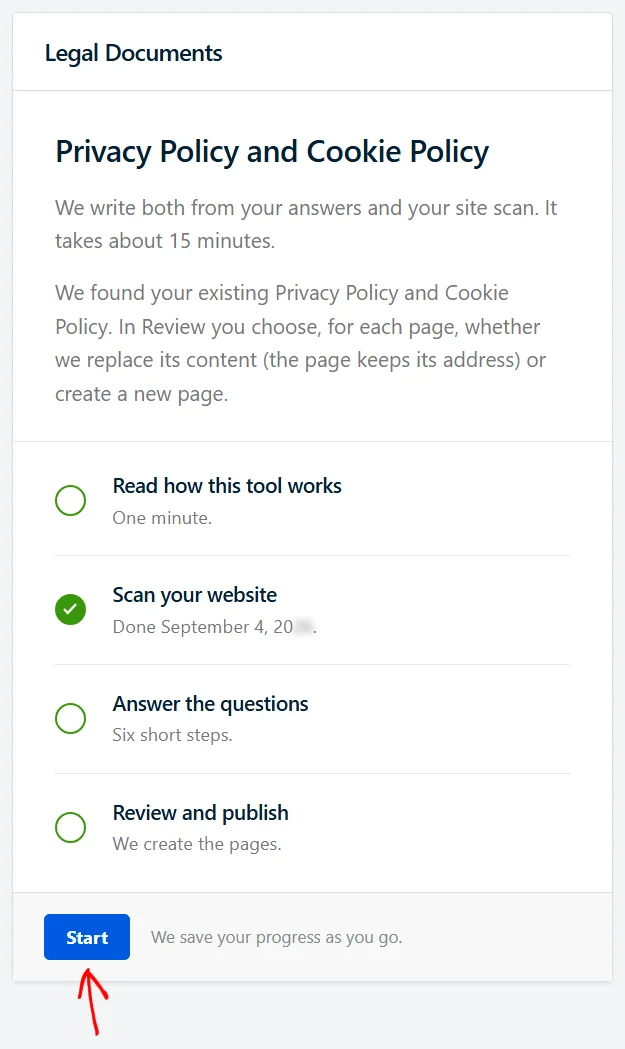
The Legal Documents card lists the 4 parts of the process. If you’ve already scanned your site, the scan step is ticked off. If you haven’t, run a scan first, because the tool asks for one before the questions.
For more, see our guide on scanning your website.
When you’re ready, click Start.
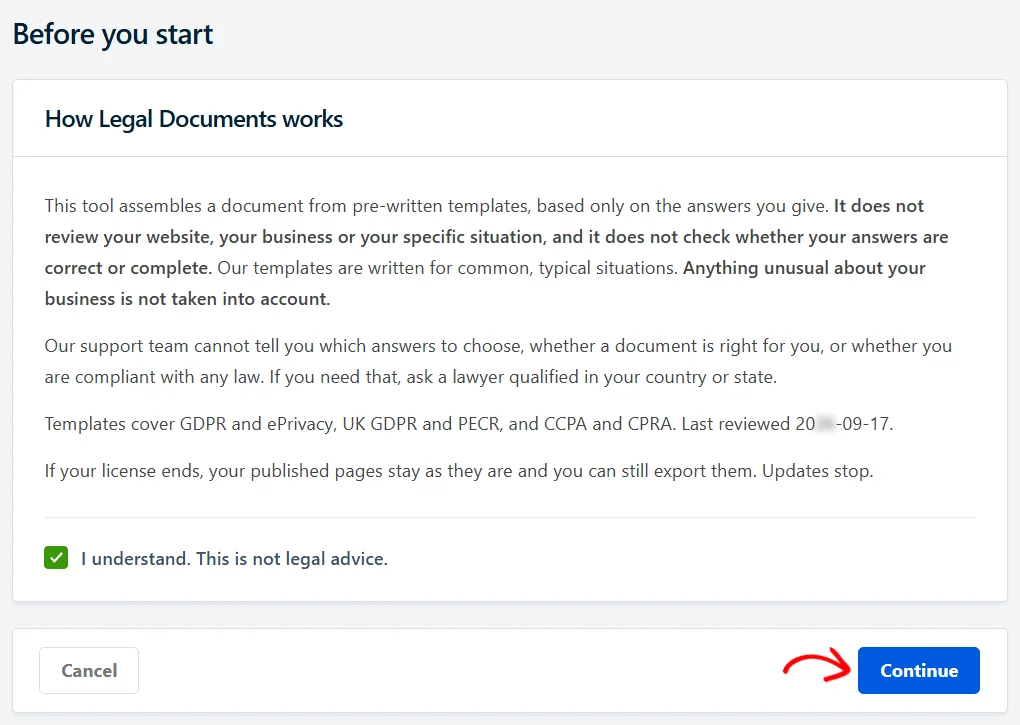
The first screen explains how the tool works. It builds your documents from pre-written templates, based only on the answers you give. It doesn’t review your business or check whether your answers are correct.
Read the explanation and tick the I understand. This is not legal advice. box. Then click Continue.
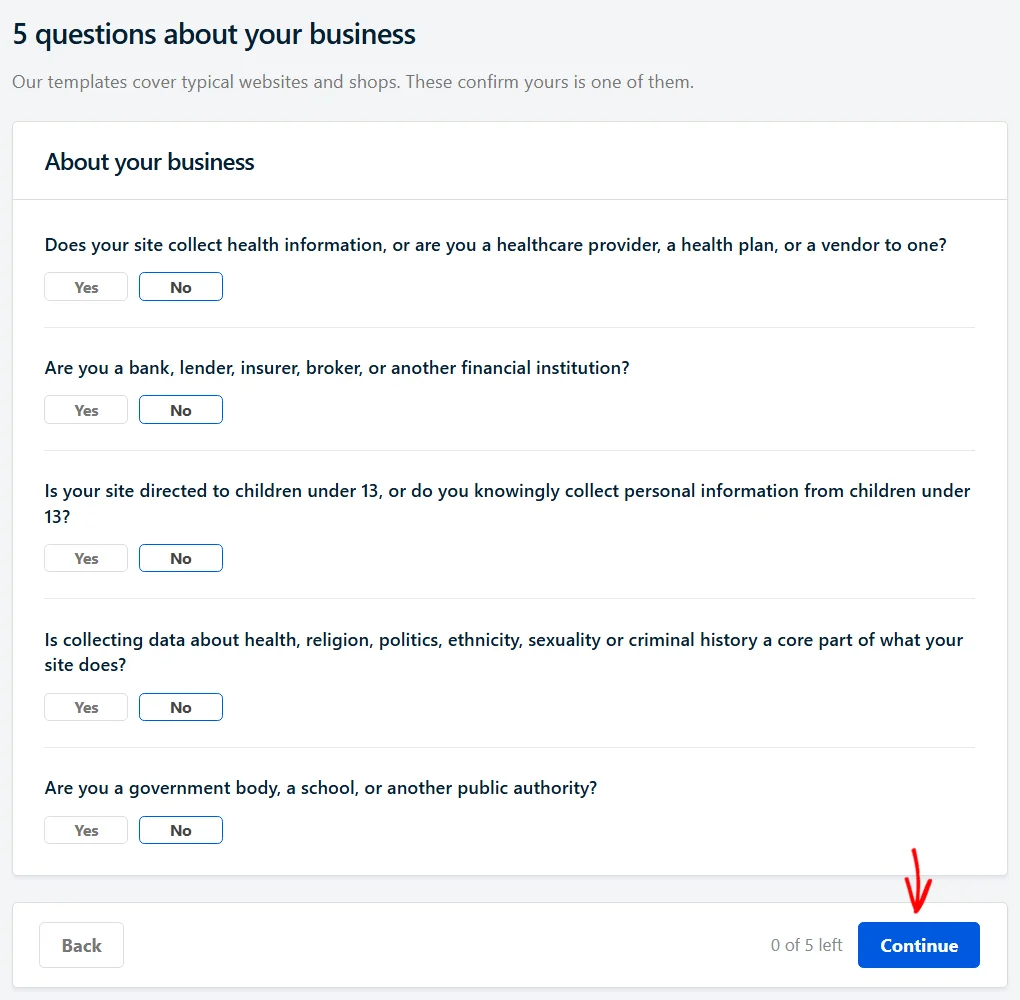
Next, you’ll see 5 questions about your business. They confirm that the templates cover your type of site. If you answer No to all 5, click Continue.
Note: If you answer Yes to any of these questions, the tool tells you it doesn’t cover your situation and doesn’t generate documents. In that case, we recommend asking a lawyer qualified in your country or state.
The questionnaire then opens on its first step.
Answering the Questions
The questionnaire has 6 steps. The bar at the top shows where you are and how much you’ve completed.
WPConsent saves your progress as you go. To leave and pick up where you left off later, click Save and Exit at any point. The Preview button next to it shows your documents as they stand so far.

The sections below walk through each step in order.
Your Business Details
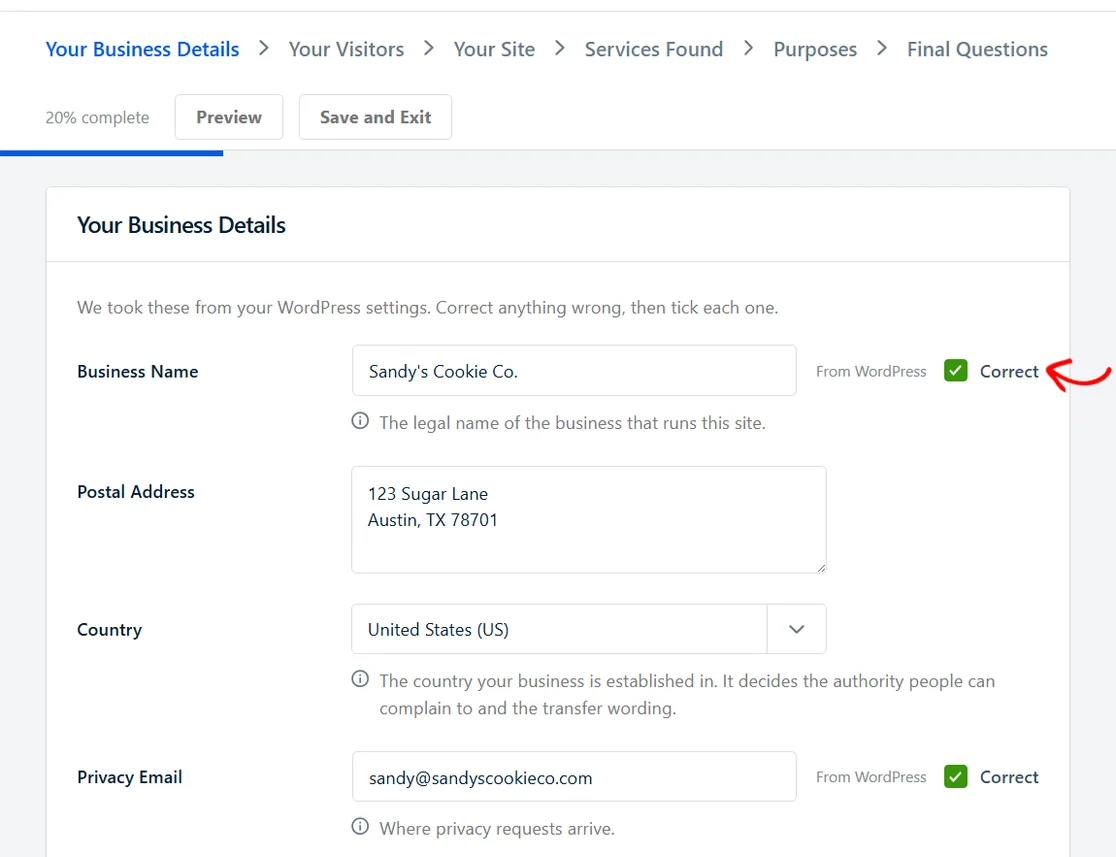
The first step asks who runs the site. WPConsent fills in your business name and privacy email from your WordPress settings.
Next, check each one and correct it if needed. Then tick its Correct box.
Then add your postal address and choose your country. The country decides which authority people can complain to and how the documents describe data sent abroad.
The rest of the fields are optional:
- Phone adds a sentence with your phone number to your documents.
- Contact Page is a link to your contact page. It only becomes required if you selected California, deal with customers offline, and haven’t given a phone number. California then asks for a second way to send requests besides email.
- Your representative in the European Union and Your representative in the United Kingdom are for businesses outside those regions that have appointed a representative there. Leave them empty if you haven’t appointed one.
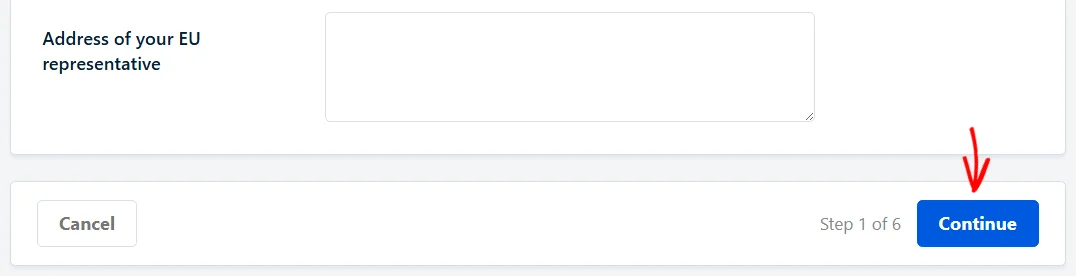
When you’ve finished a step, click Continue at the bottom of the page. You’ll do this at the end of every step.
The next step asks where your visitors come from.
Your Visitors
Next, choose the regions your visitors come from. WPConsent preselects regions from your geolocation data for the last 30 days. Tick any others that apply.
Each region you select adds the sections its laws need. If you select California, answer the few extra questions that appear below it. They cover your yearly revenue, how many California residents you hold data about, and how much of your revenue comes from selling personal data.
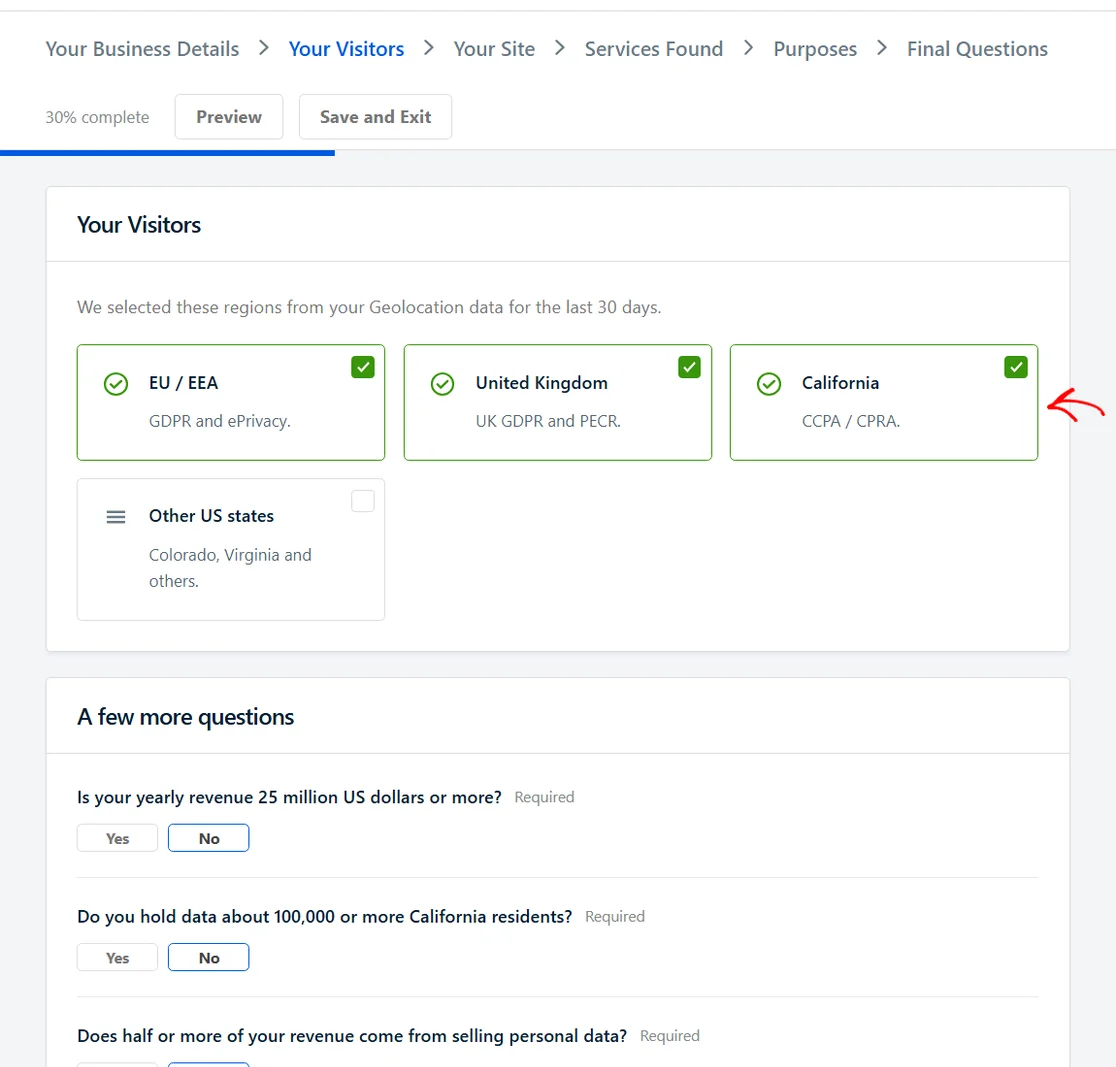
If you’re below all 3 thresholds, WPConsent still keeps the California sections because you selected the region.
Once your regions are set, the questionnaire moves on to what your site does.
Your Site
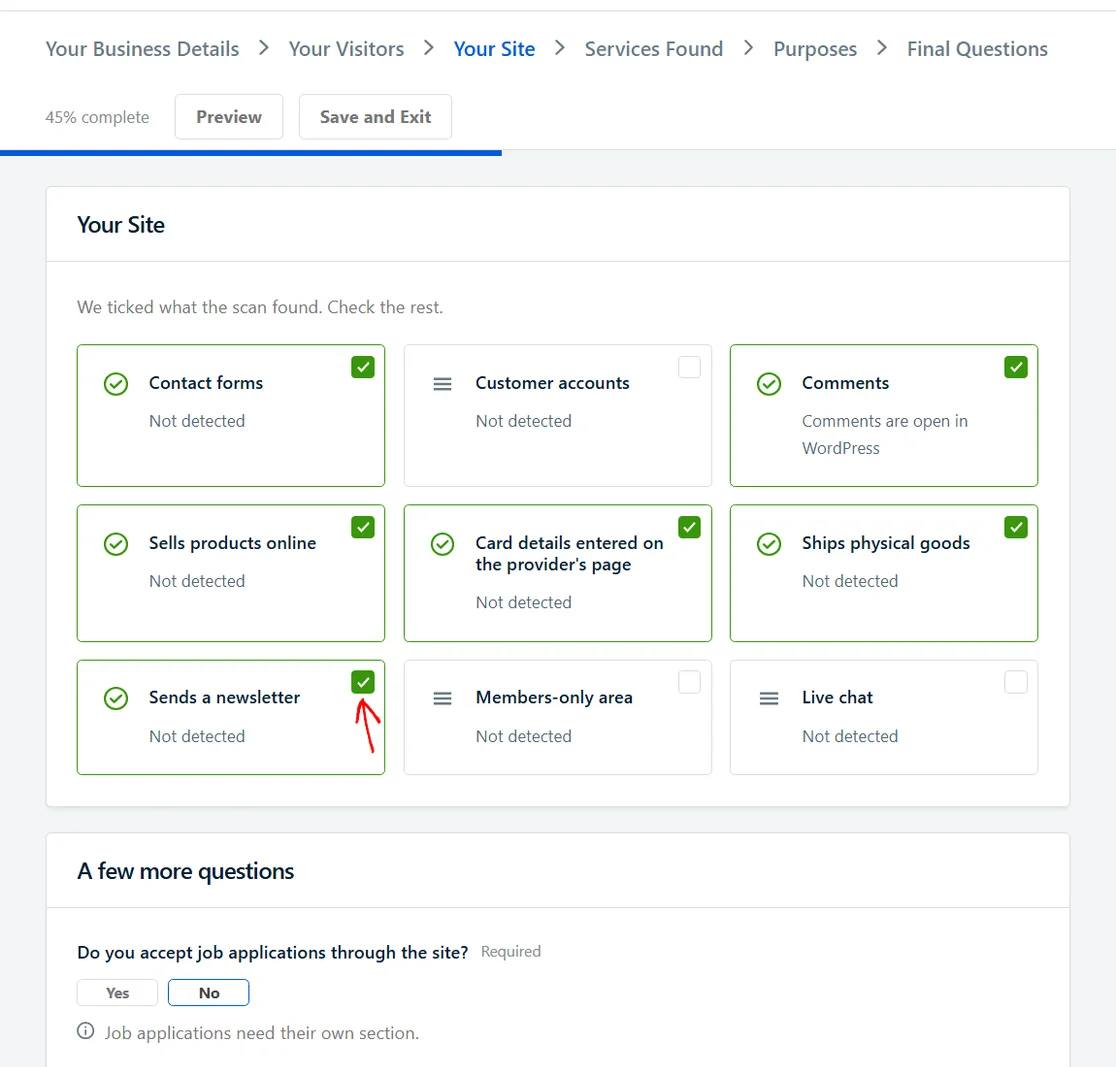
This step asks what your site does. WPConsent ticks what your scan found. Tick anything else your site does, such as selling products online, shipping physical goods, or sending a newsletter.
Below the cards, answer the questions about job applications, file uploads, whether your site is aimed at children under 16, and loyalty schemes. Each answer decides whether a section is added to your documents.
After that, the questionnaire shows the services your scan found.
Services Found
The Services Found step lists every service your scan detected, such as Google Analytics or Facebook Pixel. Each service you keep becomes a paragraph in your documents.
For each service, you can:
- Leave it out by clicking Not in use if you’ve stopped using it.
- Add the provider’s privacy policy by pasting its link into the Provider Policy field, if WPConsent doesn’t already have one.
- Add a service the scan missed by typing its name at the bottom of the table, choosing a category, and clicking Add Service.
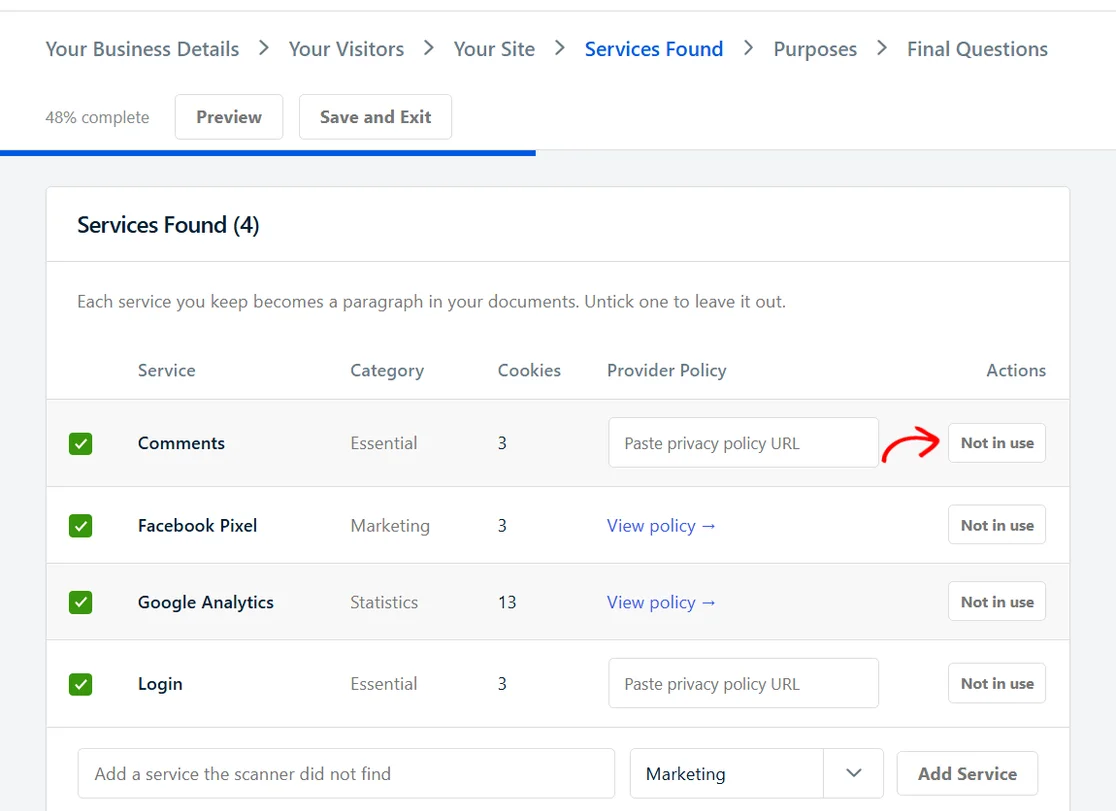
If a question appears below the table, answer it before you continue. Which question appears depends on your regions and services. For example, if you selected the United Kingdom, it asks whether you only use what your statistics tools collect to improve your website.
The next step covers why you use the personal data you collect.
Purposes
The Purposes step covers why you use personal data, such as processing orders, taking payments, sending marketing emails, or running analytics. Each purpose has its own panel. Purposes WPConsent detected on your site are already turned on.
To add a purpose, open its panel and tick the We use data for box. Then complete its 3 questions:
- What we collect: Tick each type of data you collect for this purpose.
- Why we collect it: Choose the single reason that applies.
- How long we keep it: Choose how long you keep the data.
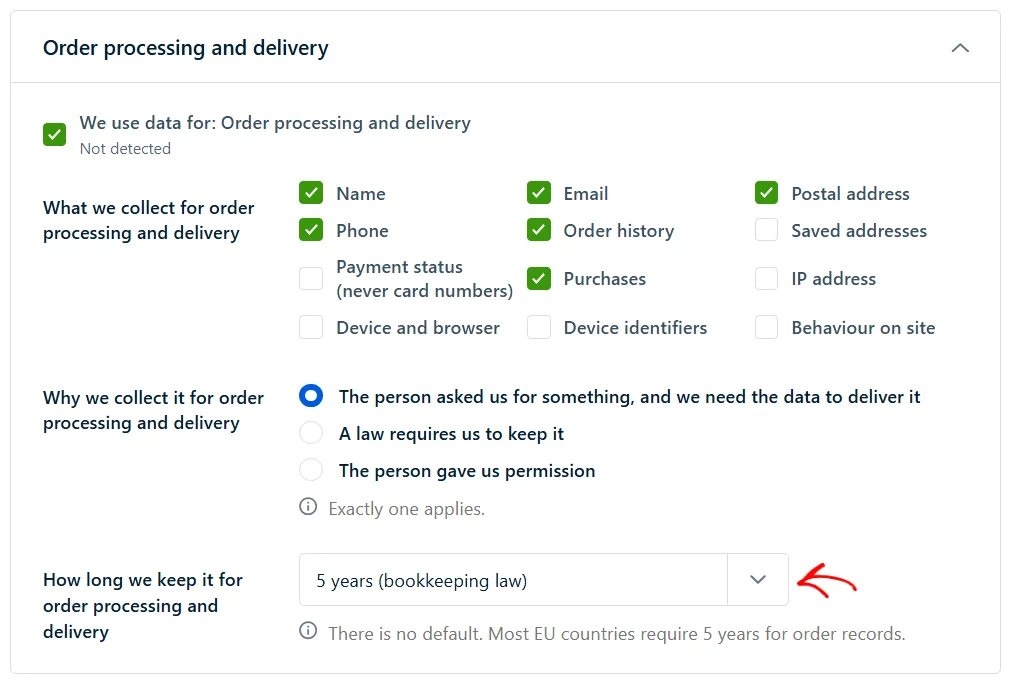
WPConsent suggests the data and reason for each purpose, but there’s no default retention period. A purpose shows a Retention needed label until you choose one. Until you do, that sentence stays out of your documents.
With your purposes set, the last step asks a few final questions.
Final Questions
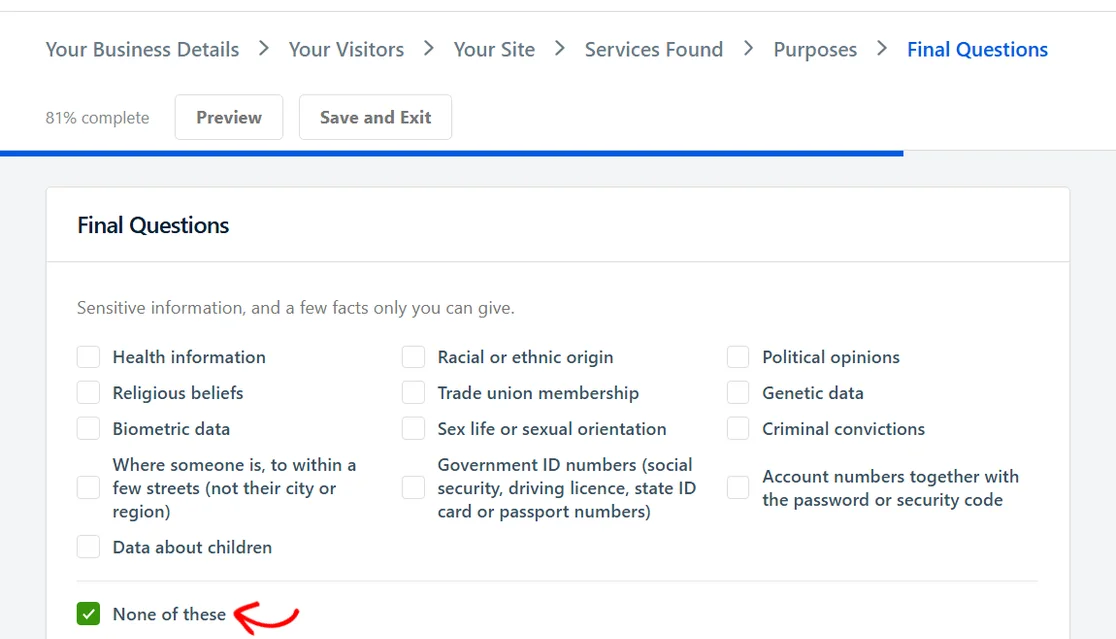
The last step asks whether you handle any sensitive information, such as health data or government ID numbers. Tick each type that applies, or tick None of these.
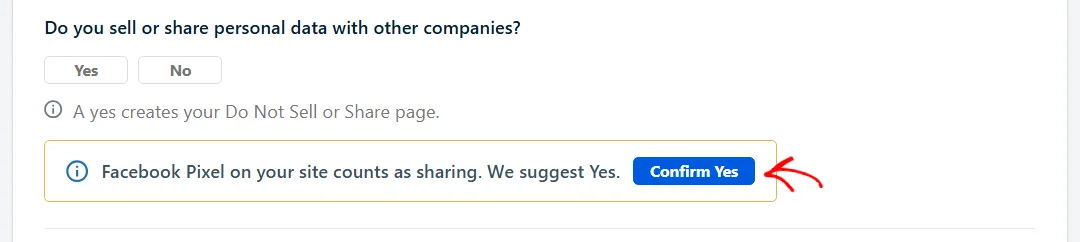
Next, answer whether you sell or share personal data with other companies. A Yes adds a Do Not Sell or Share page to your documents.
If you use advertising pixels such as Facebook Pixel, WPConsent explains that they count as sharing and suggests Yes. To accept the suggestion, click Confirm Yes.
If you answer Yes, WPConsent also checks whether Global Privacy Control is turned on. If it isn’t, you can turn it on from here.
Finally, choose how you protect data sent to providers in the United States. The options are Standard Contractual Clauses (SCCs), EU-US Data Privacy Framework certification, and Not sure yet. The step notes that providers such as Google, Meta, and Stripe process data in the US.
Then answer whether you make decisions about people by automated means alone. For example, automated fraud checks that block a checkout count. When you’re done, click Review and Publish.
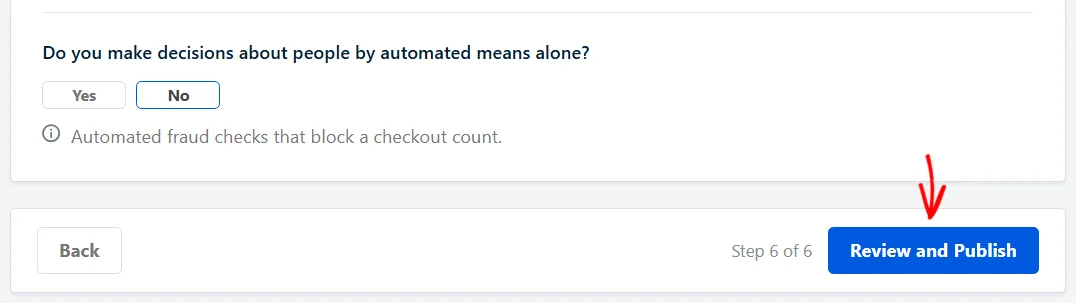
WPConsent then opens the review screen, where you check everything before it goes live.
Reviewing and Publishing Your Documents
The review screen shows everything that will be published. Nothing changes on your site until you publish.
At the top, Open Questions lists any optional questions you skipped. You can publish without answering them. Each open question leaves a single sentence out of your documents. To answer one, click Answer.
Below that, Documents to Publish lists each document your answers call for, with its number of sections and words.
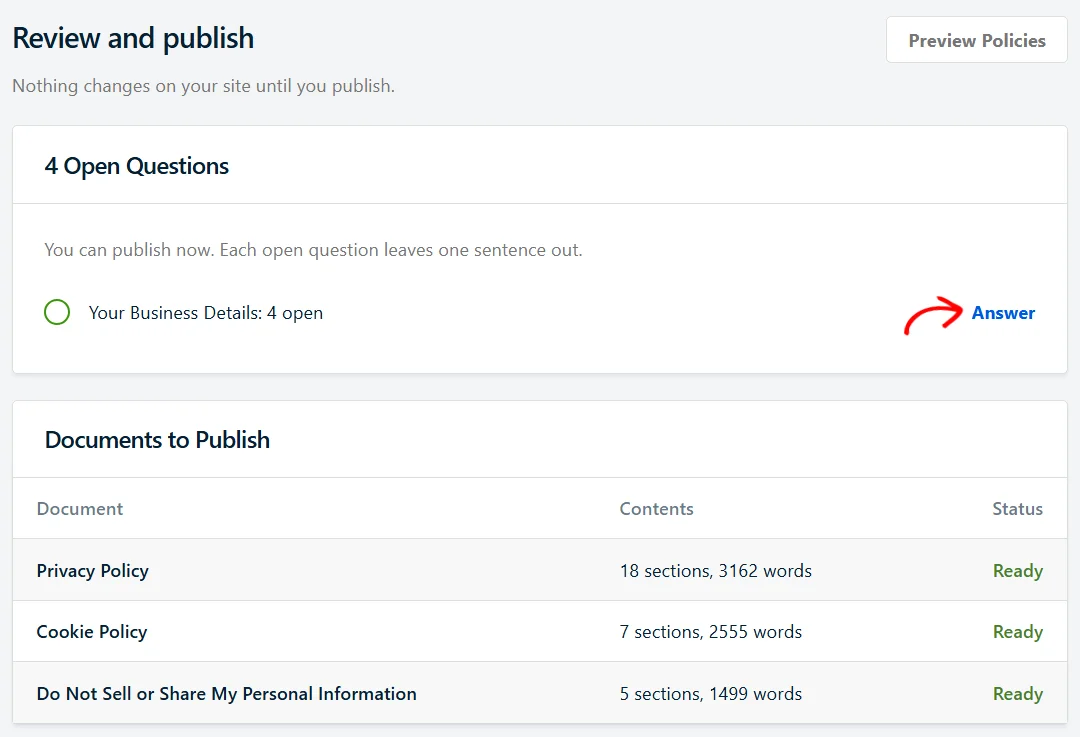
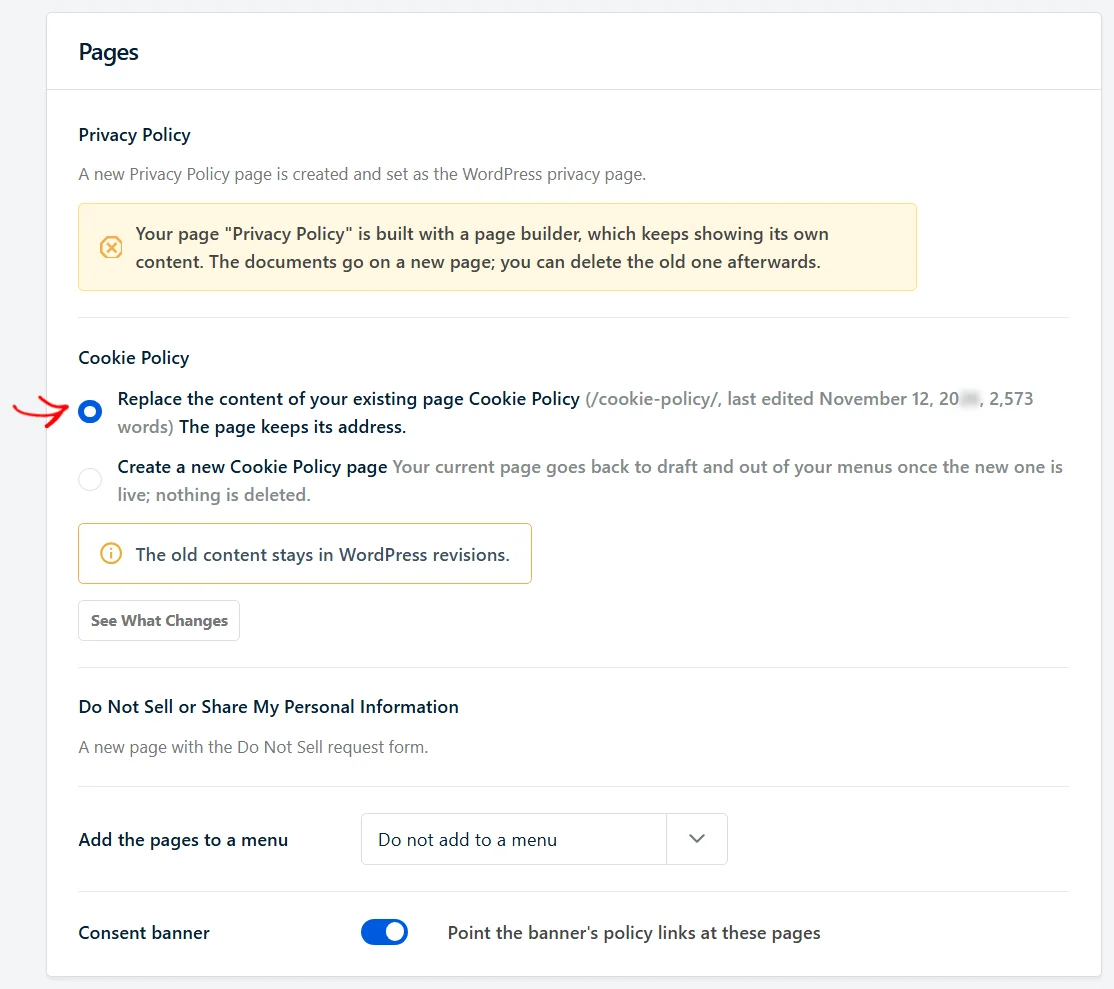
The Pages section shows where each document will go:
- New pages: If you don’t have a page for a document yet, WPConsent creates one. A new Privacy Policy page is also set as your WordPress privacy page.
- Existing pages: If you already have a page, you can replace its content or create a new page. Replacing keeps the page’s address. Links to it keep working. If you’re not sure, choose to replace it. The old content stays in WordPress revisions. For the Cookie Policy, creating a new page moves your current page back to draft and out of your menus. This happens once the new one is live. Nothing is deleted. To compare your current Cookie Policy page with the new content, click See What Changes.
- Page builder pages: If your existing page is built with a page builder, WPConsent creates a new page instead, because the builder keeps showing its own content. You can delete the old page afterwards.
At the bottom of the section, you can choose a menu from the Add the pages to a menu dropdown. WPConsent adds each document’s page to that menu. This helps visitors find your new pages. It’s set to Do not add to a menu by default.
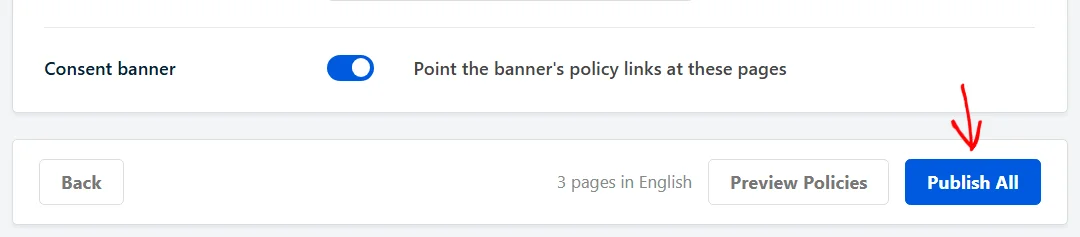
To point your banner’s policy links at the new pages, leave the Consent banner toggle on. It’s on by default. If you turn it off, the banner’s cookie policy link keeps pointing at its current page.
To read your documents before they go live, click Preview Policies.
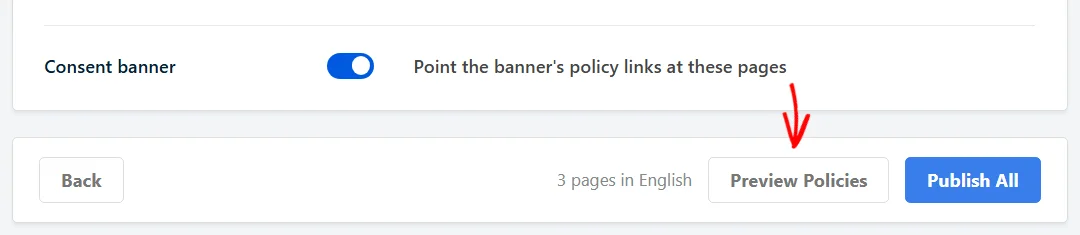
The preview opens each document in its own tab, so you can read every page before publishing.
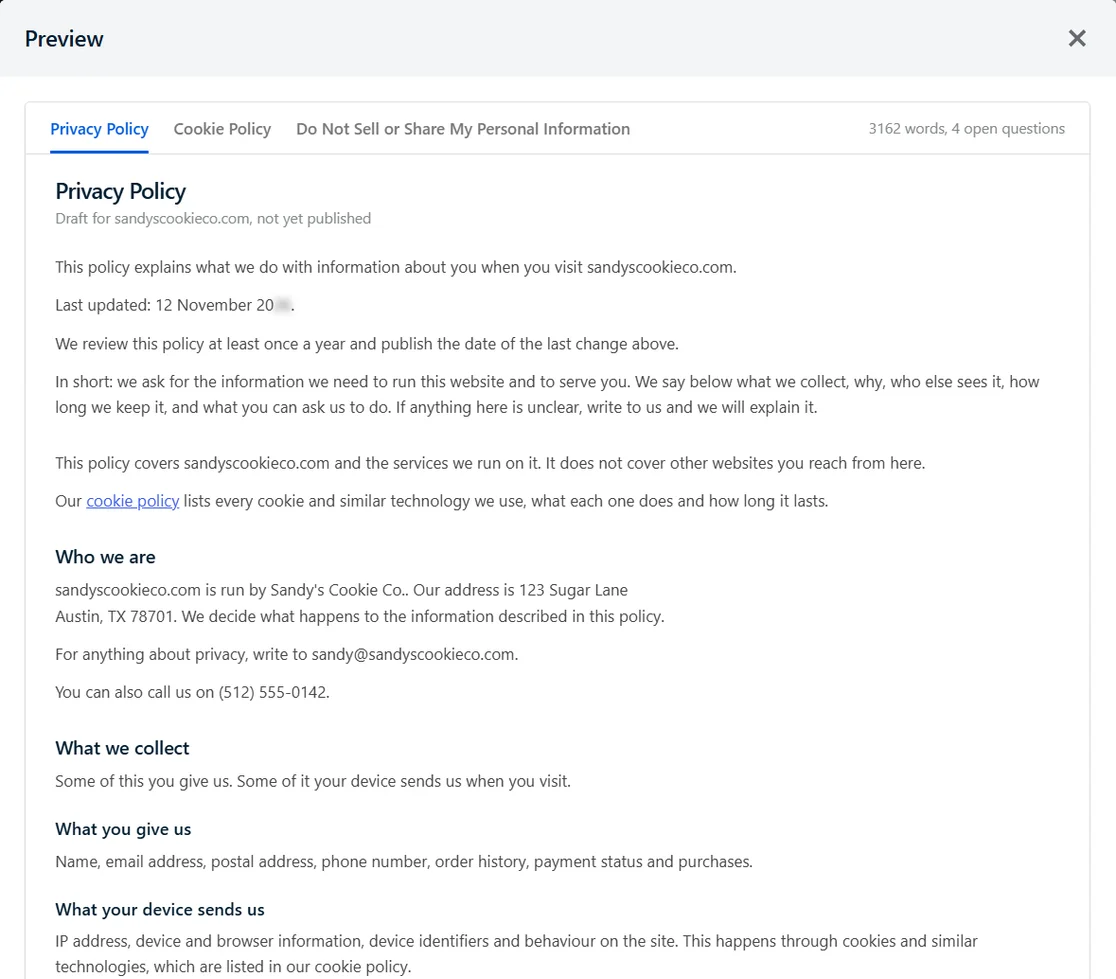
When you’re happy with your documents, close the preview and click Publish All.
WPConsent publishes your documents and takes you back to the Documents tab. A message confirms where each page lives. To open them, click View Pages.
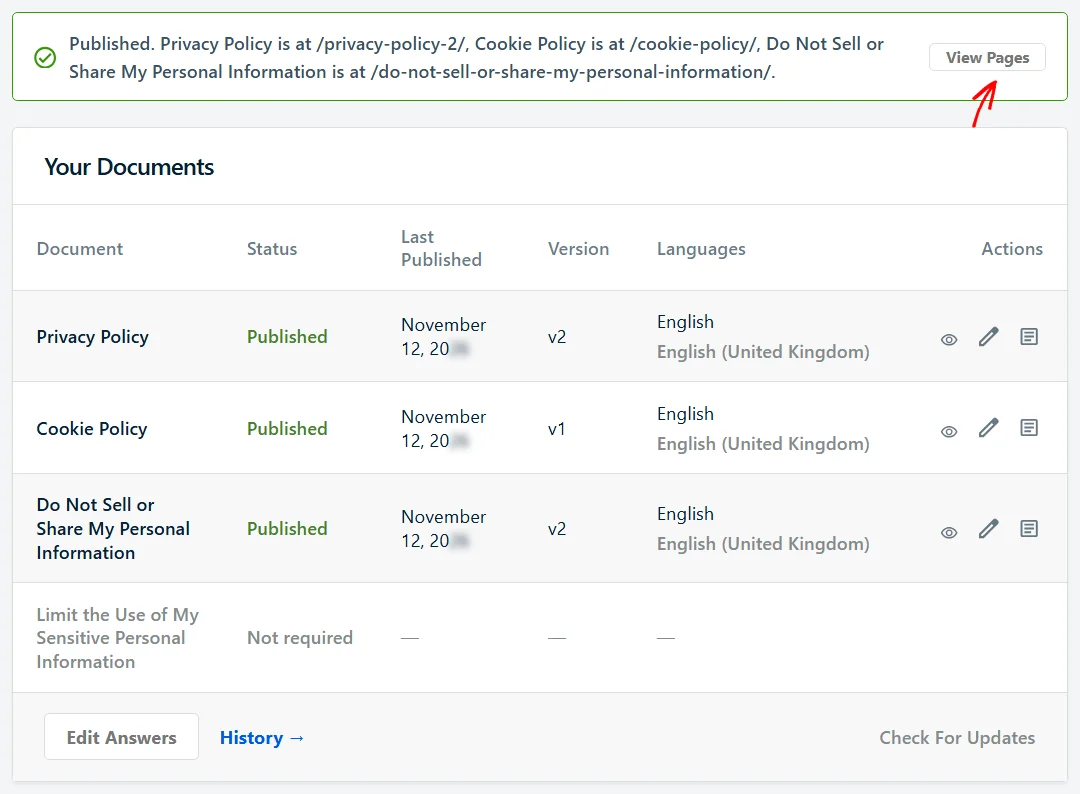
The Your Documents table shows the status, publish date, version, and languages of each document. The icons in the Actions column open the page, edit your answers, or show the document’s history.
If your site uses more than one language, each document lists its languages. A language that hasn’t been translated yet is shown in gray. To translate the document into it, click the language.
For more on languages, see our guide on multilanguage support.
After your documents are live, WPConsent helps you keep them current.
Keeping Your Documents Up to Date
WPConsent checks your documents every day. Sometimes a change needs your input, such as a scan no longer finding a service or a change in the law. When that happens, the Documents tab shows a notice asking you to review and publish the update.
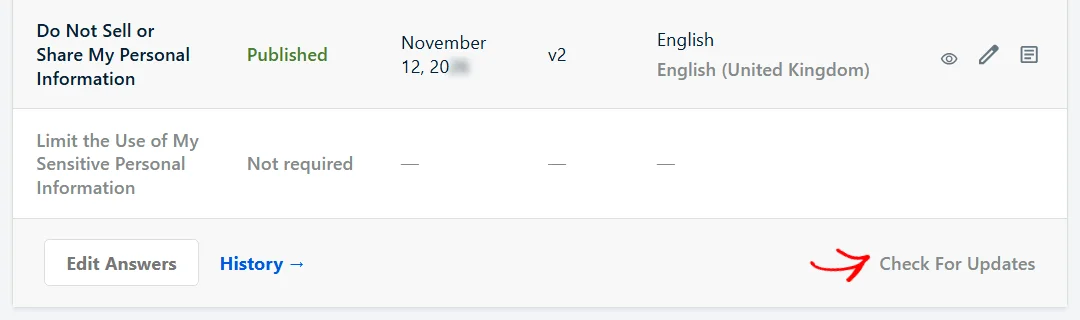
To check right away, click Check For Updates at the bottom of the Your Documents table. If nothing needs your attention, the button changes to Up to date for a few minutes.
If your business changes, click Edit Answers to go back through the questionnaire. Then review and publish your documents again.
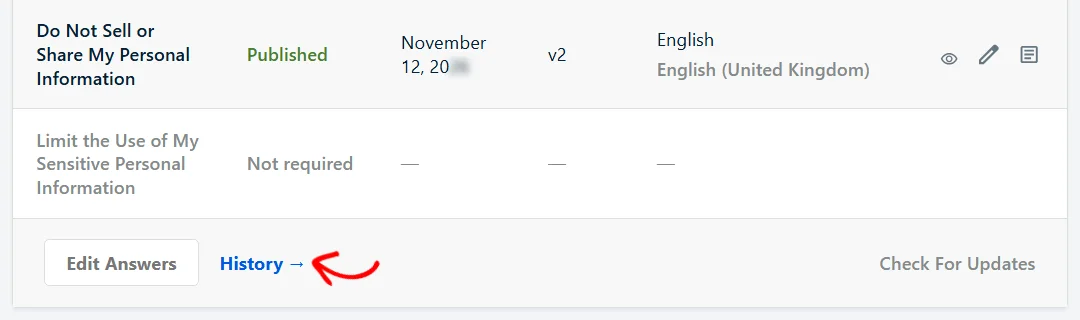
Every time you publish, WPConsent saves a new version. To see them, click History at the bottom of the Your Documents table, or open the History tab at the top of the page. Each document has its own table showing what changed, when, and who published it.
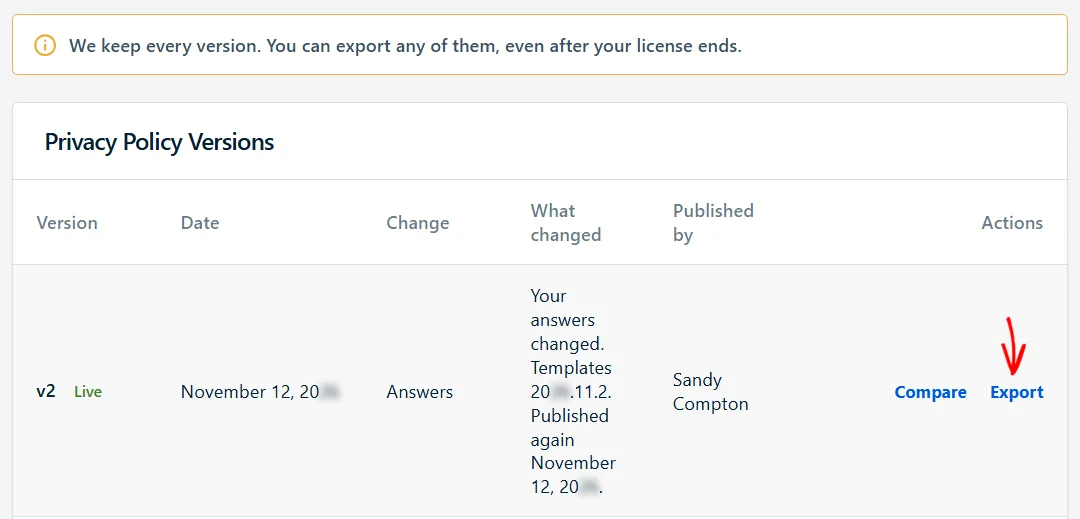
To compare a version with the one before it, click Compare. To download a version, click Export.
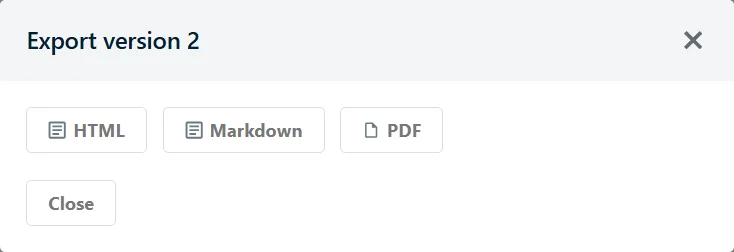
Then choose a format: HTML, Markdown, or PDF.
That’s it! You now know how to create, publish, and update your privacy policy, cookie policy, and Do Not Sell page with WPConsent. Next, take a look at our guide on setting up Do Not Sell or Share to manage the requests your new page receives.
Frequently Asked Questions
Below, we’ve answered some of the most common questions about Legal Documents.
Is Legal Documents a substitute for legal advice?
No. The tool builds your documents from pre-written templates based only on your answers. It doesn’t review your business or check whether your answers are complete. Our support team also can’t tell you which answers to choose. If you need advice about your situation, ask a lawyer qualified in your country or state.
Which documents can WPConsent create?
WPConsent always creates a Privacy Policy and a Cookie Policy. Depending on your answers, it can also create 2 more pages: Do Not Sell or Share My Personal Information, and Limit the Use of My Sensitive Personal Information. Any document your answers don’t call for is marked Not required in the Your Documents table.
Why does the tool say it doesn’t cover my situation?
You answered Yes to one of the 5 questions about your business, such as collecting health information or running a financial institution. The templates are written for typical websites and shops, so the tool doesn’t generate documents for those cases. If you picked Yes by mistake, click Change My Answers.
Do I need the Do Not Sell addon?
Yes, for the Do Not Sell or Share page. That page includes the addon’s request form, so it isn’t published until the addon is installed and activated. Every license that includes Legal Documents also includes the Do Not Sell addon.
Can I publish before answering every question?
Yes, as long as you’ve answered the required questions. Each optional question you leave open removes a single sentence from your documents. You’ll find them under Open Questions on the review screen and on the Documents tab.
What happens to my documents if my license expires?
Your published pages stay exactly as they are. You can still export any version from the History tab. Your documents no longer receive updates.