
Would you like to give visitors a form for asking you not to sell or share their personal information?
In this guide, we’ll walk you through setting up the WPConsent Do Not Sell request form, its email notifications, and its CSV exports.
All you need is the Do Not Sell addon and a few minutes in your WordPress admin.
Table of contents
- Installing the Do Not Sell Addon
- Creating Your Do Not Sell Page
- Choosing Which Fields the Form Asks For
- Getting an Email for Each Request
- Seeing the Form as a Visitor Does
- Working Through Incoming Requests
- Exporting Your Requests
- Frequently Asked Questions
Before you get started, make sure WPConsent is installed and activated on your WordPress site.
Requirements: Do Not Sell is a separate addon, and it requires a Plus license level or higher.
Installing the Do Not Sell Addon
To get started, we’ll put the addon in place. Do Not Sell ships separately from the main plugin, so the request form, the email notifications, and the CSV exports all arrive with it.
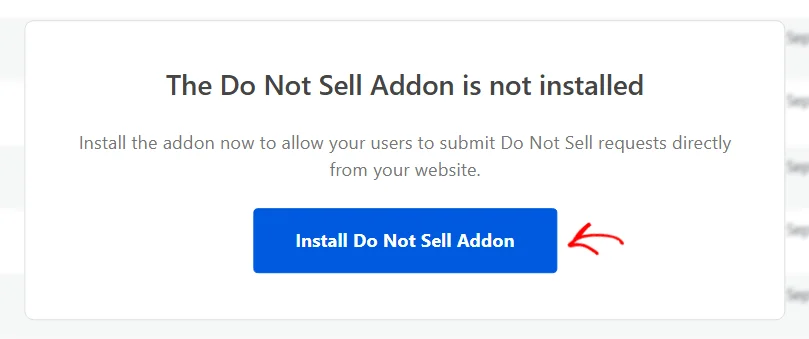
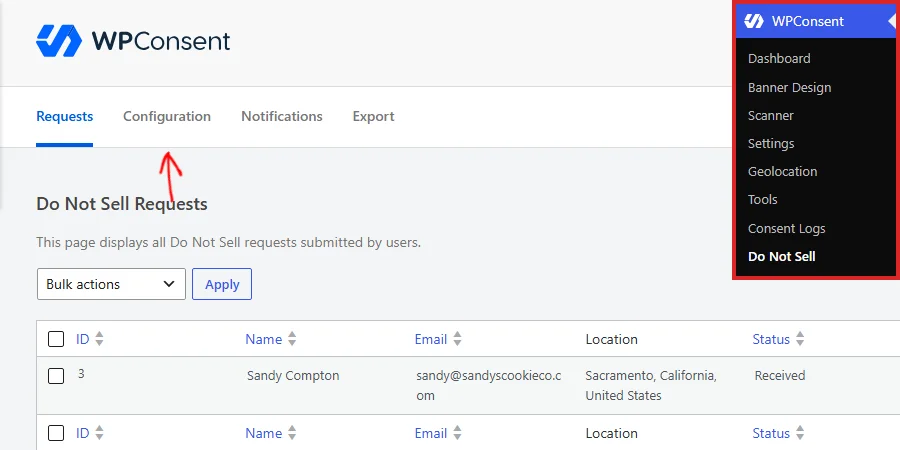
From your WordPress admin sidebar, go to WPConsent » Do Not Sell. The page opens on the Requests tab, with Configuration, Notifications, and Export alongside it. Until the addon is in place those panels sit behind a card telling you so.
On that card, click Install Do Not Sell Addon. WPConsent fetches the addon and switches it on in the same step, so there is nothing to download by hand and nothing to activate afterwards.
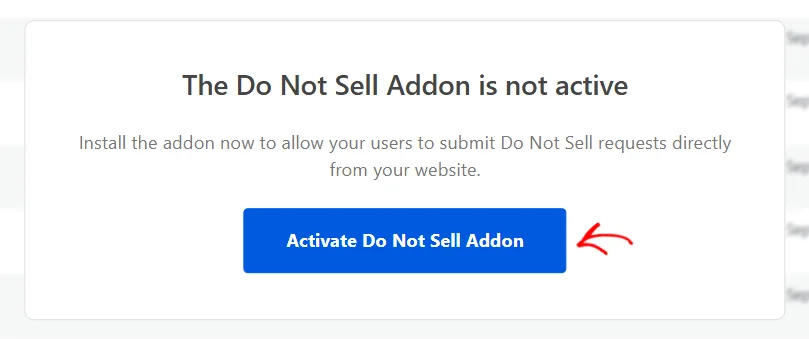
If the addon is already on your site but switched off, the card reads The Do Not Sell Addon is not active instead, and the button reads Activate Do Not Sell Addon. One click does the same job either way.
The page then reloads with the card gone and all four tabs ready to use. The rest of the setup happens across those tabs, starting with the page your form sits on.
Creating Your Do Not Sell Page
Next, we’ll create the page your form lives on.
The form is delivered by a shortcode, so it needs a page of its own. WPConsent can build that page for you.
From the Do Not Sell page, select the Configuration tab.
The tab opens on a panel called Do Not Sell Page Configuration. The Do Not Sell Page field is where you tell WPConsent which page carries your form. The note underneath it names the shortcode that page needs.
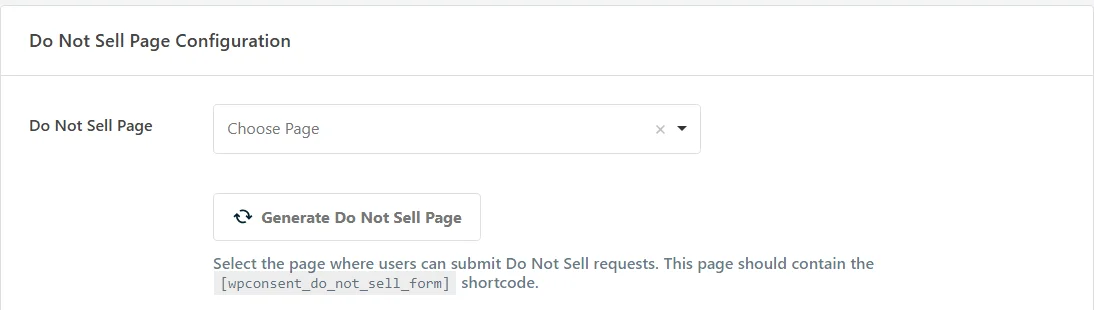
If you don’t have a page for this yet, click Generate Do Not Sell Page.

WPConsent publishes a page titled Do Not Sell My Personal Information and drops the form shortcode into it, under a short line of introductory text. It also selects that page in the field above.
A confirmation appears with a View Page button, so you can read the new page straight away.
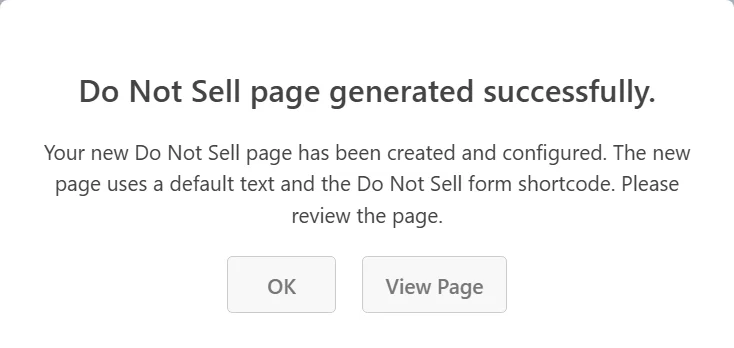
With a page selected, the row shows a View Page link beside the picker and hides the Generate button.
Note: You can use a page you already have instead. Add the [[wpconsent_do_not_sell_form]] shortcode to it, then pick that page in the Do Not Sell Page field and save. See How to Add a Shortcode in WordPress if you have not done that before.
Choosing Which Fields the Form Asks For
Further down the Configuration tab, the Form Fields panel decides what the form asks a visitor for.
The first row sets the wording on the button visitors press. It starts out holding Submit Request, which is what a visitor sees unless you change it.
To change it, type your own text in the Submit Button Text field.
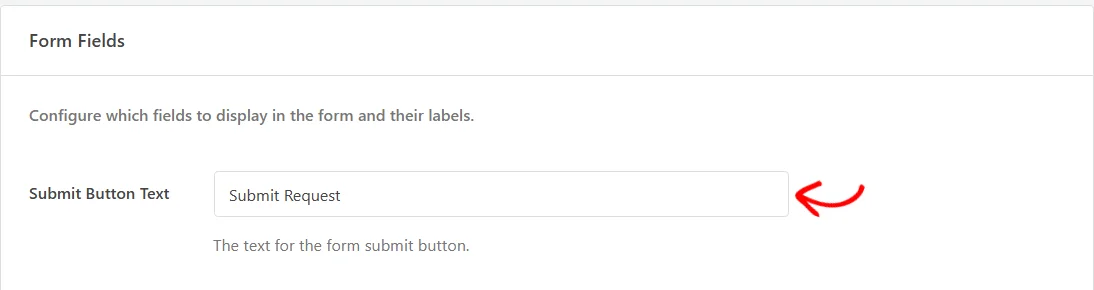
Below that, each field the form can ask for gets its own block. First Name, Last Name, and Email come first, each marked as always required. WPConsent needs those three to record a request against a person.
Six more fields are available and start out switched off: Address, ZIP Code, City, State, Country, and Phone. To add one to your form, switch on Enable this field.

Each block has two more controls. Make this field required means a visitor cannot submit the form without filling it in.
The Field Label box sets the wording a visitor sees above that input on your form, so you can ask for a Postcode rather than a ZIP Code.
City, State, and Country are the three worth enabling if you want the Location column filled in on your request list. That column is built from exactly those fields.
When you have the fields you want, click Save Changes at the bottom of the tab.

Spam Protection
The bottom of the Form Fields panel carries a Spam Protection section.
WPConsent reads whatever CAPTCHA you have already set up in our form builder plugin, WPForms, and applies it to this form. Google reCAPTCHA, hCaptcha, and Cloudflare Turnstile all work here. The section tells you which of those it found, and links you straight to the WPForms screen where they are set up.
If WPForms is not on your site yet, the same section offers to install it for you.
Two quieter checks run whether or not you use a CAPTCHA. The form carries a hidden field that visitors never see and bots tend to fill in. It also ignores anything submitted in the first two seconds after the page loads.
Submissions from visitors who are not logged in are also capped at five in any ten minute window from one address.
Getting an Email for Each Request
Nobody watches a dashboard all day, so it is worth having WPConsent tell you when a request arrives.
Next, select the Notifications tab.

The tab opens on a panel called Email Notifications. From here, switch on Email Notifications.
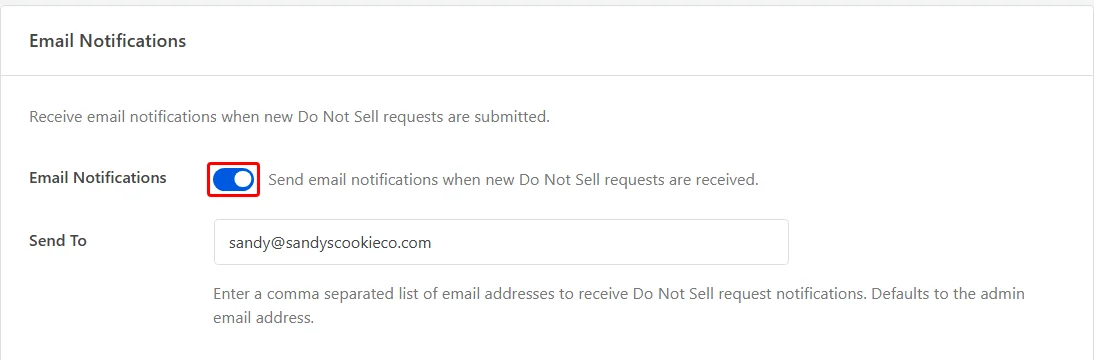
With the toggle off, requests still arrive in your dashboard. They just do not email anyone.
The Send To field takes a comma separated list of addresses, and starts out holding your site’s admin email. Each new request sends one email per address.
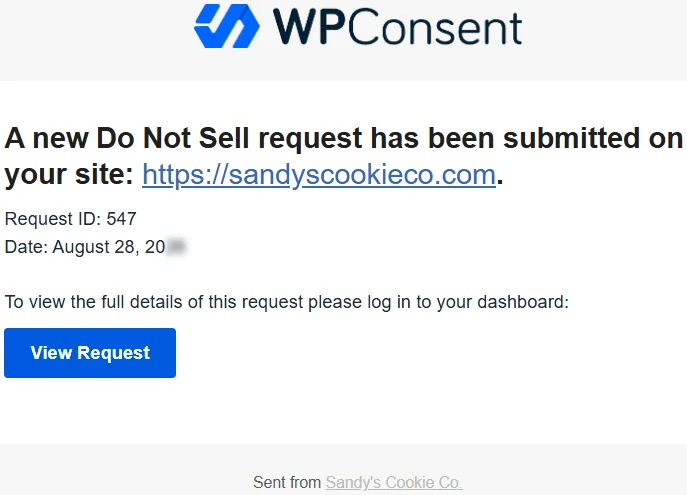
That email carries the request ID, the date it arrived, and a button that opens the request in your dashboard.
To see what it looks like before a real one goes out, click Preview Email. It opens a sample in a new tab.
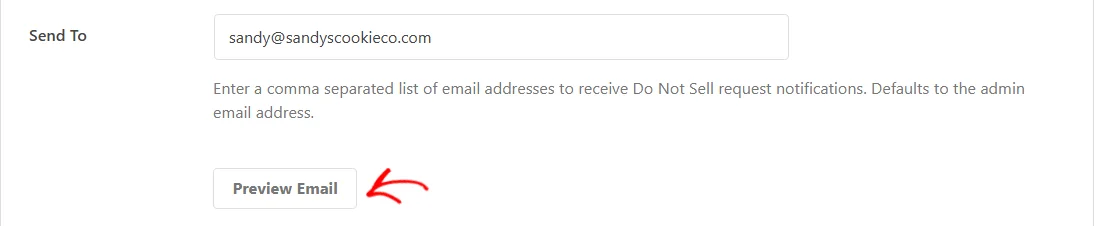
The sample is built from a placeholder request, so you can read the wording and see where the request ID and the date sit.
When you’re done, click Save Changes at the bottom of the tab.

Notifications go out from that moment on. With the form and the alerts both in place, the next thing worth doing is reading the page as a visitor.
Seeing the Form as a Visitor Does
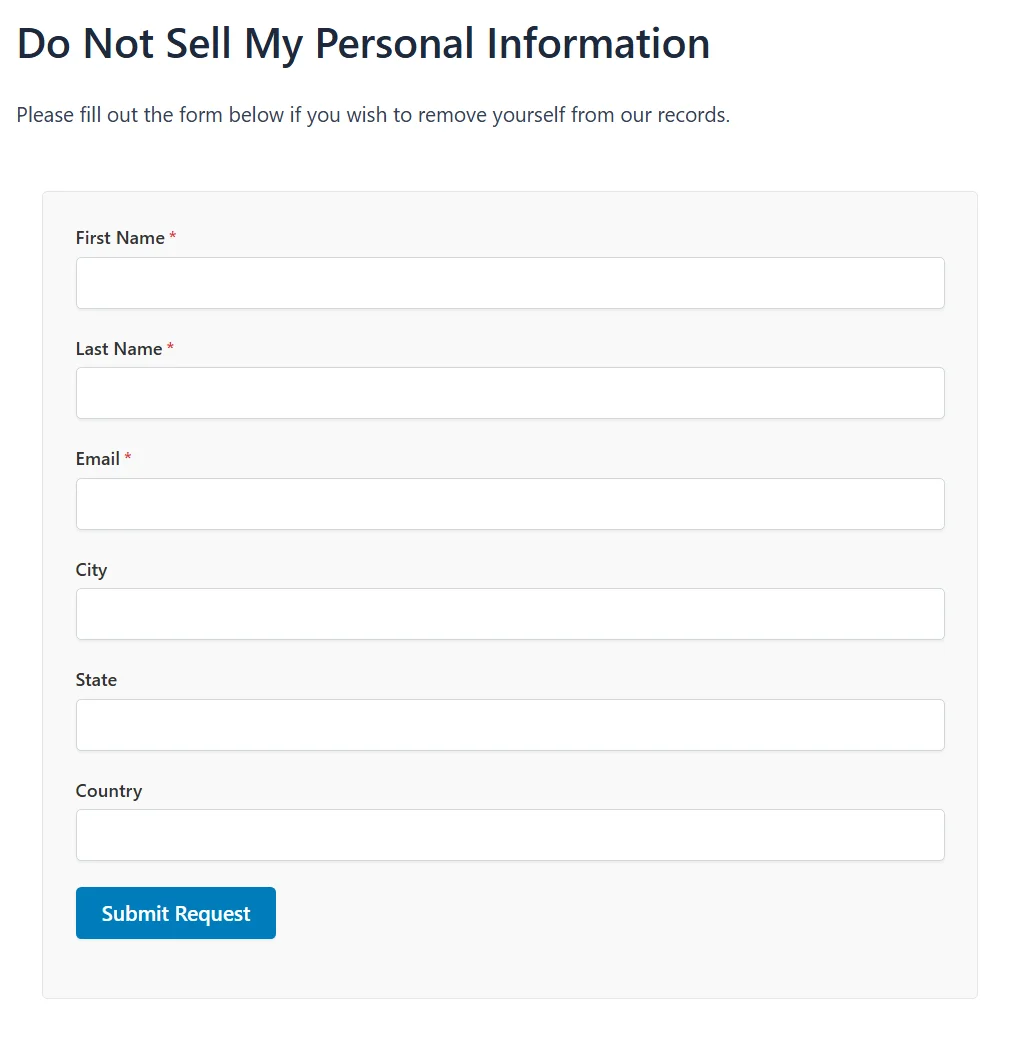
The page you generated is an ordinary WordPress page, so it picks up your theme’s styling like any other.
To read it the way a visitor will, open your Do Not Sell page in a new tab.
The form asks for the fields you enabled, in the order they appear on the Configuration tab, with a red asterisk beside every required one. The button carries whatever you typed as your submit button text.
After a visitor submits the form, it is replaced by a short confirmation so they can see the request went through.
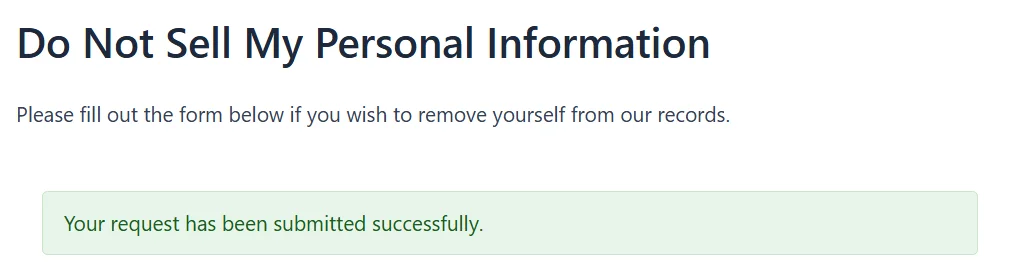
That is everything the visitor sees. The request itself is now waiting for you in your dashboard.
Working Through Incoming Requests
Every submission is stored on your own site rather than sent anywhere else.
Back in your WordPress admin, select the Requests tab.

Every request your visitors have submitted is listed there, newest first.
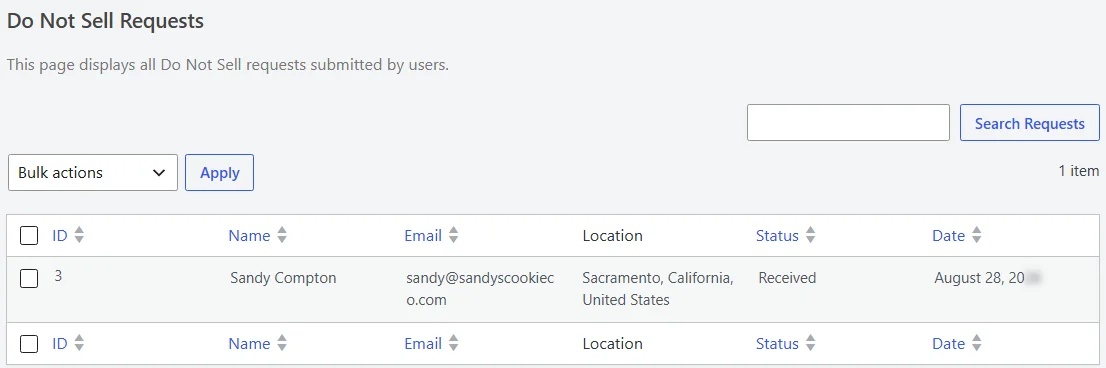
The table gives you the request ID, the visitor’s name and email, and the date it arrived. A Location column is built from the city, state, and country fields, so it stays empty unless you enabled those.
ID, Name, Email, Status, and Date are all sortable. The search box above the table looks through names and email addresses, and requests are listed 20 to a page, newest first.
A new request arrives with the status Received. Once you have dealt with it, hover over its row to reveal the actions underneath the name.
From there, click Mark as Processed.

The status changes to Processed, and the row records which user marked it and when. That is what makes the list useful as a record months later.
To work through a batch at once, tick the rows you want. Then choose Mark as Processed from the Bulk actions selector above the table, and click Apply.

WordPress confirms the change at the top of the tab, and every row you ticked moves to Processed.
Exporting Your Requests
The Export tab hands you the same records as a CSV file.
Still on the Do Not Sell page, select the Export tab.

The tab opens on a panel called Export Do Not Sell Requests.
In the From: and To: fields, set the date range you want. Once the two options below them are set the way you want, click Export.
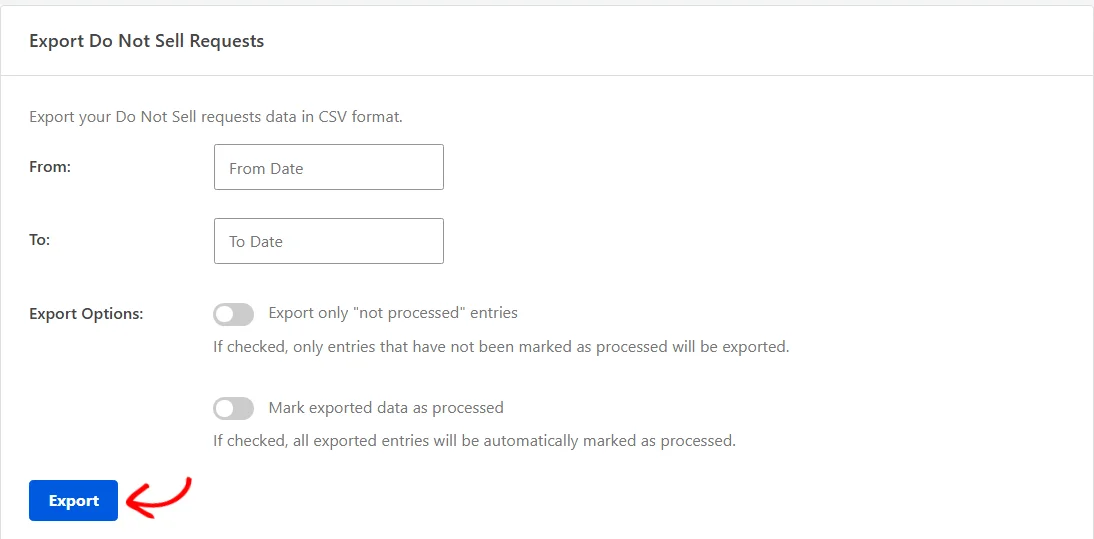
Both dates are required, and both options below them start out switched off.
The first, Export only “not processed” entries, leaves out anything already marked Processed.
The second, Mark exported data as processed, marks every row it exports as it goes. That is handy if the export is how you hand requests over to someone else.
A progress bar runs while WPConsent works through the records in batches, then the file downloads. Each row carries the request ID, every name and address field the form collects, and the status. It also carries when the request arrived, and when and by whom it was processed.
That’s it! You now have a Do Not Sell request form on your site and an email for every submission. You also have a dated record of what you did about each request, and a CSV export of the lot.
Next, take a look at setting up geolocation rules, which lets you run a different banner setup for visitors in a particular region.
Frequently Asked Questions
Below, we’ve answered some of the most common questions about Do Not Sell requests.
Where do I get the Do Not Sell addon?
It is a separate addon rather than part of the main plugin, and WPConsent installs it for you from the Do Not Sell page. See the Installing the Do Not Sell Addon section above.
Why does my generated page show a different shortcode name?
WPConsent registers two names for the same form, and the page it generates for you uses the older of them. Both render the same fields, so there is nothing to change.
Why is a field missing from my form?
Because its Enable this field toggle is still off. Only First Name, Last Name, and Email appear without being switched on.
Everything else needs enabling on the Configuration tab and a Save Changes afterwards.
Why is the Location column empty on my requests?
Because Location is built from the city, state, and country a visitor typed in, and those three fields start out switched off. Enable the ones you want, and the column fills in for requests that arrive afterwards.
Do I have to mark requests as processed?
No. It is a bookmark for you, not something the form waits on. Nothing else changes when you mark a request, apart from the export option that skips processed entries.
Can I delete a request?
Yes, from the Database tab under WPConsent Tools rather than from the Requests tab. Its Clear Do Not Sell Logs panel deletes requests older than a period you choose.
See managing the WPConsent database and cache for that screen.
Why didn’t my export download anything?
Either one of the date fields was empty, in which case WPConsent asks for both before it starts. The other possibility is that no request fell inside the range you set.
In that second case it tells you no records were found rather than handing you an empty file, so widening the range fixes it.
My notification emails aren’t arriving. What should I check?
Start with the Notifications tab: Email Notifications has to be switched on and saved, and Send To has to hold at least one address. WPConsent skips any entry that is not a valid email address.
Preview Email tells you whether the template itself renders. Beyond that, email delivery depends on how your host sends mail.
See How to Fix WordPress Not Sending Email Issue for the usual causes and how to rule each one out.
Can I translate the form labels?
Yes. WPConsent registers your submit button text and every field label as translatable strings, alongside the banner text it already handles.
See setting up multilanguage support for how to add a language and fill in its wording.
Does this make my site compliant?
That is a question for whoever advises you on privacy law, and it depends on far more than one form. What WPConsent gives you here is the form itself, a dated record of every request, and an export you can hand on.