Want to fine-tune WPConsent beyond the basics? The Advanced tab gives you control over Clarity Consent Mode, subdomain cookie sharing, Global Privacy Control, usage tracking, and data cleanup. This guide walks you through every advanced setting in WPConsent.
Table of contents
- Prerequisites
- Opening the Advanced tab
- Configuring Clarity Consent Mode
- Enabling shared consent across subdomains
- Respecting Global Privacy Control signals
- Allowing usage tracking
- Resetting content to defaults
- Removing all data on uninstall
- Saving your changes
- Verifying your setup
- FAQ
- Conclusion
Prerequisites
Before you begin, make sure you have:
- WPConsent installed and activated on your site
- Administrator access to your WordPress dashboard
- The consent banner enabled under the general settings tab (most advanced settings depend on an active banner)
Opening the Advanced tab
To get started, navigate to WPConsent >> Settings in your WordPress admin menu. Then click the Advanced tab at the top of the page.
The Advanced tab has 3 sections:
- Custom Iframes/Scripts (paid version only) for adding custom blocking rules
- Hide Banner Rules (paid version only) for controlling where the banner appears
- Advanced Settings for all users, covered in detail below
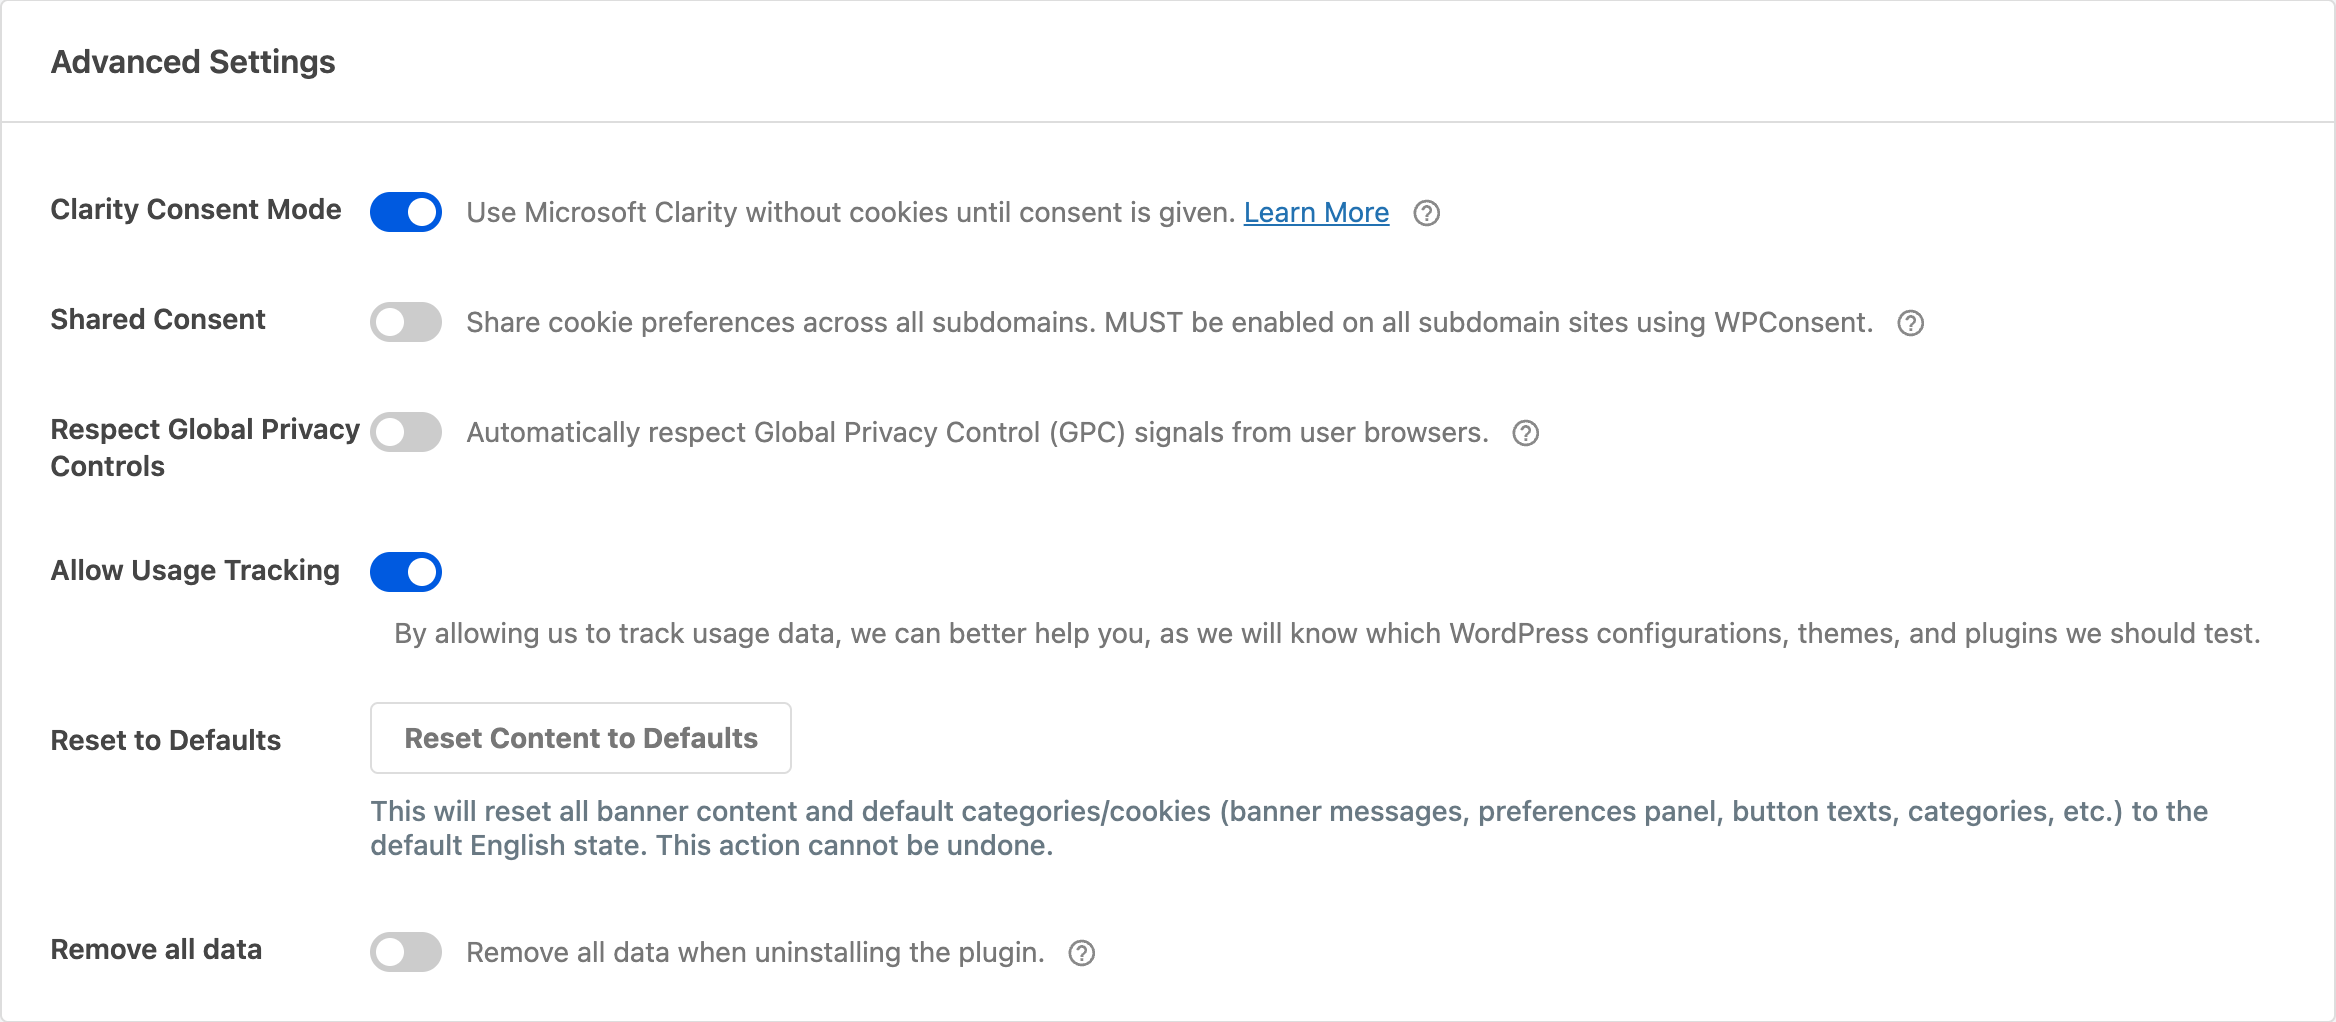
Configuring Clarity Consent Mode
This toggle is on by default. When enabled, Microsoft Clarity runs in cookieless mode until the visitor gives consent. Clarity still collects behavioral data like heatmaps and session recordings, but it won’t set cookies until the visitor accepts the relevant cookie category.
With this setting active, WPConsent skips blocking the Clarity script. Instead, it lets Clarity load immediately in its restricted mode and upgrades to full tracking only after consent.
To disable Clarity Consent Mode, turn off the Clarity Consent Mode toggle. This tells WPConsent to block the Clarity script entirely until consent is given, rather than allowing cookieless data collection.
Note: Clarity Consent Mode doesn’t load when the consent banner is disabled.

Enabling shared consent across subdomains
This toggle is off by default. When enabled, WPConsent sets consent cookies on the registrable domain (for example, .example.com) instead of the exact hostname. A visitor who accepts cookies on www.example.com is also consented on blog.example.com, shop.example.com, and any other subdomain.
WPConsent automatically calculates the correct cookie domain from your site’s home URL. You don’t need to enter it manually.
To enable this feature, turn on the Shared Consent toggle. Make sure you also enable it on every subdomain site that uses WPConsent.
Important: All subdomain sites must have this toggle enabled. If one subdomain has it on and another doesn’t, consent preferences won’t sync consistently.
Developers can customize the calculated domain with the wpconsent_cookie_domain filter.

Respecting Global Privacy Control signals
This toggle is off by default. When enabled, WPConsent detects the Global Privacy Control (GPC) signal from a visitor’s browser. If GPC is active, non-essential cookies are automatically declined and the banner doesn’t appear for that visitor.
Turning on this setting also reveals 2 additional text fields on the Banner Design >> Content tab:
- GPC Toast Message: a brief notification shown to visitors whose GPC signal is honored (default: “GPC Signal Honored”)
- GPC Override Message: text for a toggle in the preferences panel that lets visitors override GPC and allow cookies anyway
To enable GPC support, turn on the Respect Global Privacy Controls toggle. This helps comply with regulations like the California Consumer Privacy Act (CCPA) that treat GPC as a valid opt-out mechanism.

Resetting content to defaults
This is a one-time action, not a stored setting. It resets all banner content and default categories/cookies to their original English state. This includes:
- Banner messages and button text
- Preferences panel title and description
- Cookie table headers
- Default cookie categories and cookies
To reset, click the Reset Content to Defaults button. A confirmation dialog warns you before the action runs. This can’t be undone.
Before resetting, export your settings under WPConsent >> Tools >> Export as a backup.

Removing all data on uninstall
This toggle is off by default. When enabled, WPConsent removes all plugin data from your database when you uninstall (delete) the plugin. This includes:
- All cookie posts and cookie category terms
- All plugin options stored under
wpconsent_* - All user meta and post meta created by WPConsent
- All transients created by WPConsent
- Uploaded files in the
wp-content/uploads/wpconsent/directory - The consent logs database table (paid version)
- The Do Not Sell requests database table (paid version)
- Scheduled cron events created by WPConsent
When disabled, your settings and data stay in the database after uninstalling. This lets you reinstall later without losing your configuration.
To enable a clean removal, turn on the Remove all data toggle before uninstalling WPConsent. Keep it off if you plan to reinstall later.
Warning: Data removed by this setting is unrecoverable. Export your settings under WPConsent >> Tools >> Export before enabling this option and uninstalling.

Saving your changes
After adjusting your advanced settings, click the Save Changes button at the bottom of the page.
Verifying your setup
Follow these steps to confirm your advanced settings are working:
- Shared Consent: Open your site on the main domain and accept cookies. Then open a subdomain and confirm the banner doesn’t appear. In your browser developer tools, check Application >> Cookies and verify the cookie domain starts with a dot (for example,
.example.com). - GPC: Enable GPC in your browser (in Firefox: Settings >> Privacy & Security >> “Tell websites not to sell or share my data”). Visit your site and confirm the banner doesn’t appear and a toast notification displays briefly.
- Debug parameter: Append
?wpconsent_debug=trueto any page URL on your site. Confirm that scripts load without blocking. This parameter disables all cookie blocking output for that page load. - Remove data: Enable the toggle, deactivate and delete the plugin, then check the database for any
wpconsent_*options. None should remain.
FAQ
Do I need to enable shared consent on every subdomain?
Yes. Every subdomain site running WPConsent must have the Shared Consent toggle enabled. If any subdomain has it off, consent preferences won’t sync to that subdomain.
Why isn’t my browser’s GPC signal being detected?
Not all browsers support GPC. Confirm your browser sends the Sec-GPC: 1 header by checking the Network tab in your browser developer tools. Also verify the Respect Global Privacy Controls toggle is enabled and that you’ve saved your settings.
What does the debug URL parameter do?
Appending ?wpconsent_debug=true to a page URL disables all cookie blocking for that page load. This helps you verify whether an issue is caused by WPConsent’s blocking. If the issue disappears with that parameter, WPConsent’s blocking is involved.
Will my settings be lost if I deactivate WPConsent?
No. Deactivating the plugin keeps all your data intact. Data is only removed when you uninstall (delete) the plugin with the Remove all data toggle enabled.
Conclusion
You’ve now configured WPConsent’s advanced settings, including Clarity Consent Mode, shared consent, Global Privacy Control, and data cleanup options. For more on customizing what visitors see in the banner, check out the guide on banner content and text.