Want to customize the text visitors see in your consent banner and preferences panel? WPConsent lets you edit every label, message, and heading from a single Content tab. This guide walks you through configuring all banner content and text settings.
Table of contents
- Prerequisites
- Opening the Content tab
- Editing the banner message
- Customizing banner buttons
- Disabling the close button
- Configuring the preferences panel
- Customizing cookie table headers
- Configuring GPC messages
- Uploading a logo
- Hiding the powered by link
- Saving and enabling the banner
- Verifying your setup
- FAQ
- Conclusion
Prerequisites
Before you begin, make sure you have the following in place:
- WPConsent is installed and activated on your site.
- You have administrator access to your WordPress dashboard.
- You’ve already chosen a banner layout and style in the Layout and Style tabs.
Opening the Content tab
To get started, navigate to WPConsent >> Banner Design in your WordPress admin menu. Then click the Content tab at the top of the page. The tabs follow a 3-step flow: Layout, Style, and Content.

Editing the banner message
The Message field is a rich text editor that controls the main text visitors see in the banner. You can format your message with bold, italic, links, and lists.
The default message reads:
We use cookies to improve your experience on our site. By using our site, you consent to cookies.
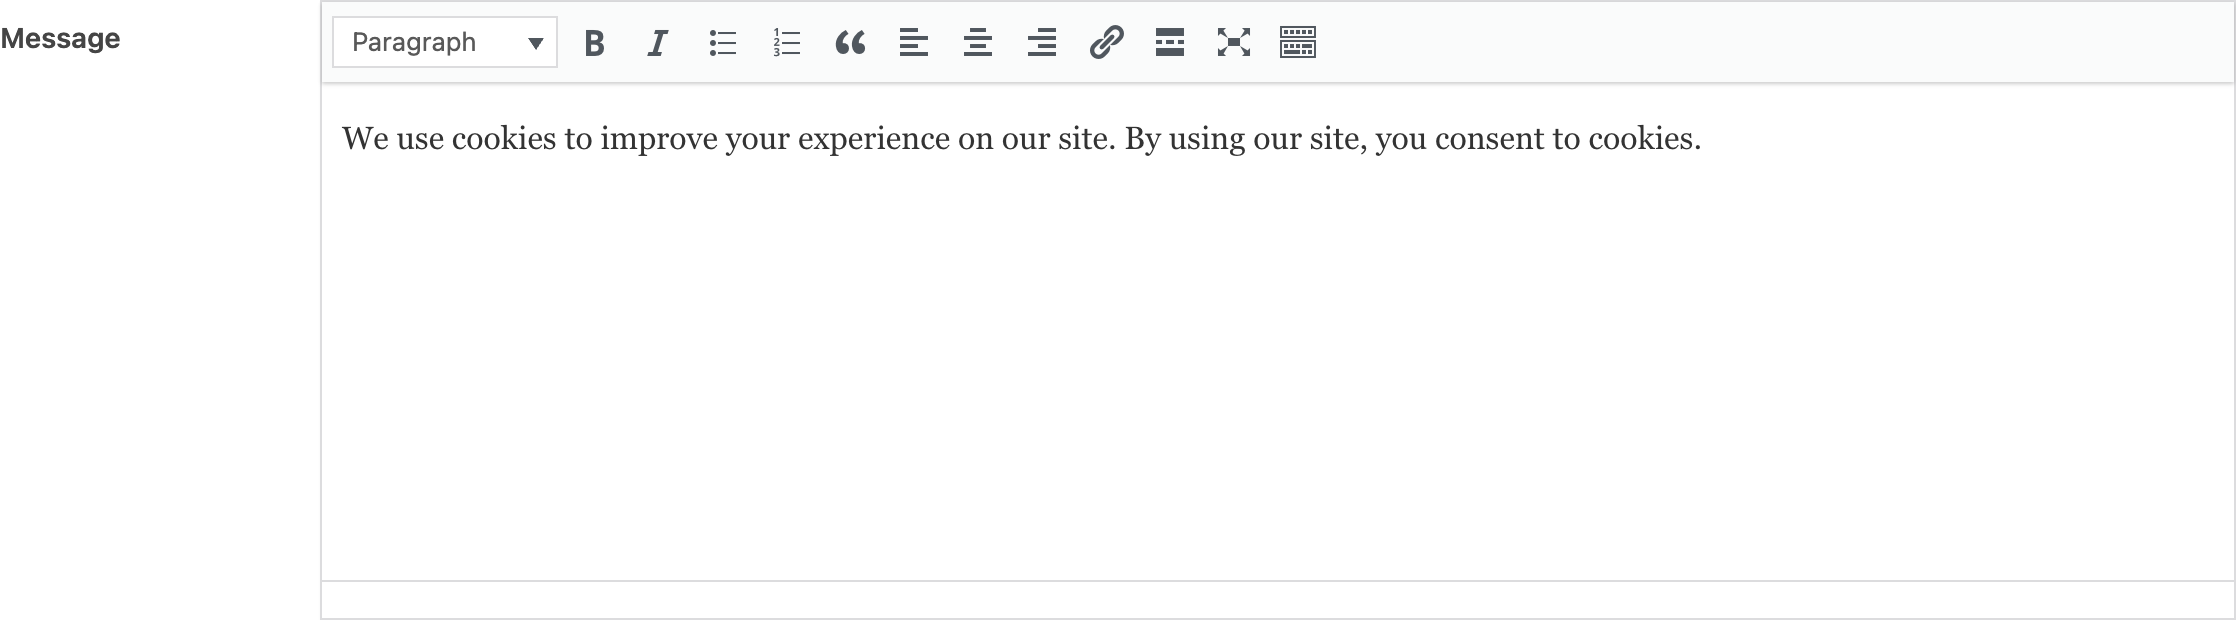
Update this text to match your site’s tone and legal requirements. Keep it concise so visitors read it quickly.
Customizing banner buttons
Below the message, the Buttons section lets you configure 3 banner buttons. Each button has a drag handle, a text input, and a toggle.
| Button | Default label |
|---|---|
| Accept Button | Accept All |
| Reject Button | Reject |
| Settings Button | Preferences |
For each button you can:
- Change the label by typing a new value in the text input field.
- Enable or disable it using the toggle in the Status column. All 3 buttons are enabled by default.
- Reorder buttons by dragging the handle on the left side of each row. The default order is Preferences, Reject, Accept.
The banner preview at the bottom of the page updates as you make changes.
Disabling the close button
The Disable Close Button toggle removes the close (x) button from the banner corner. When you enable this option, visitors must click one of the banner buttons to dismiss the banner. They can’t close it without making a choice.
This toggle is enabled by default.
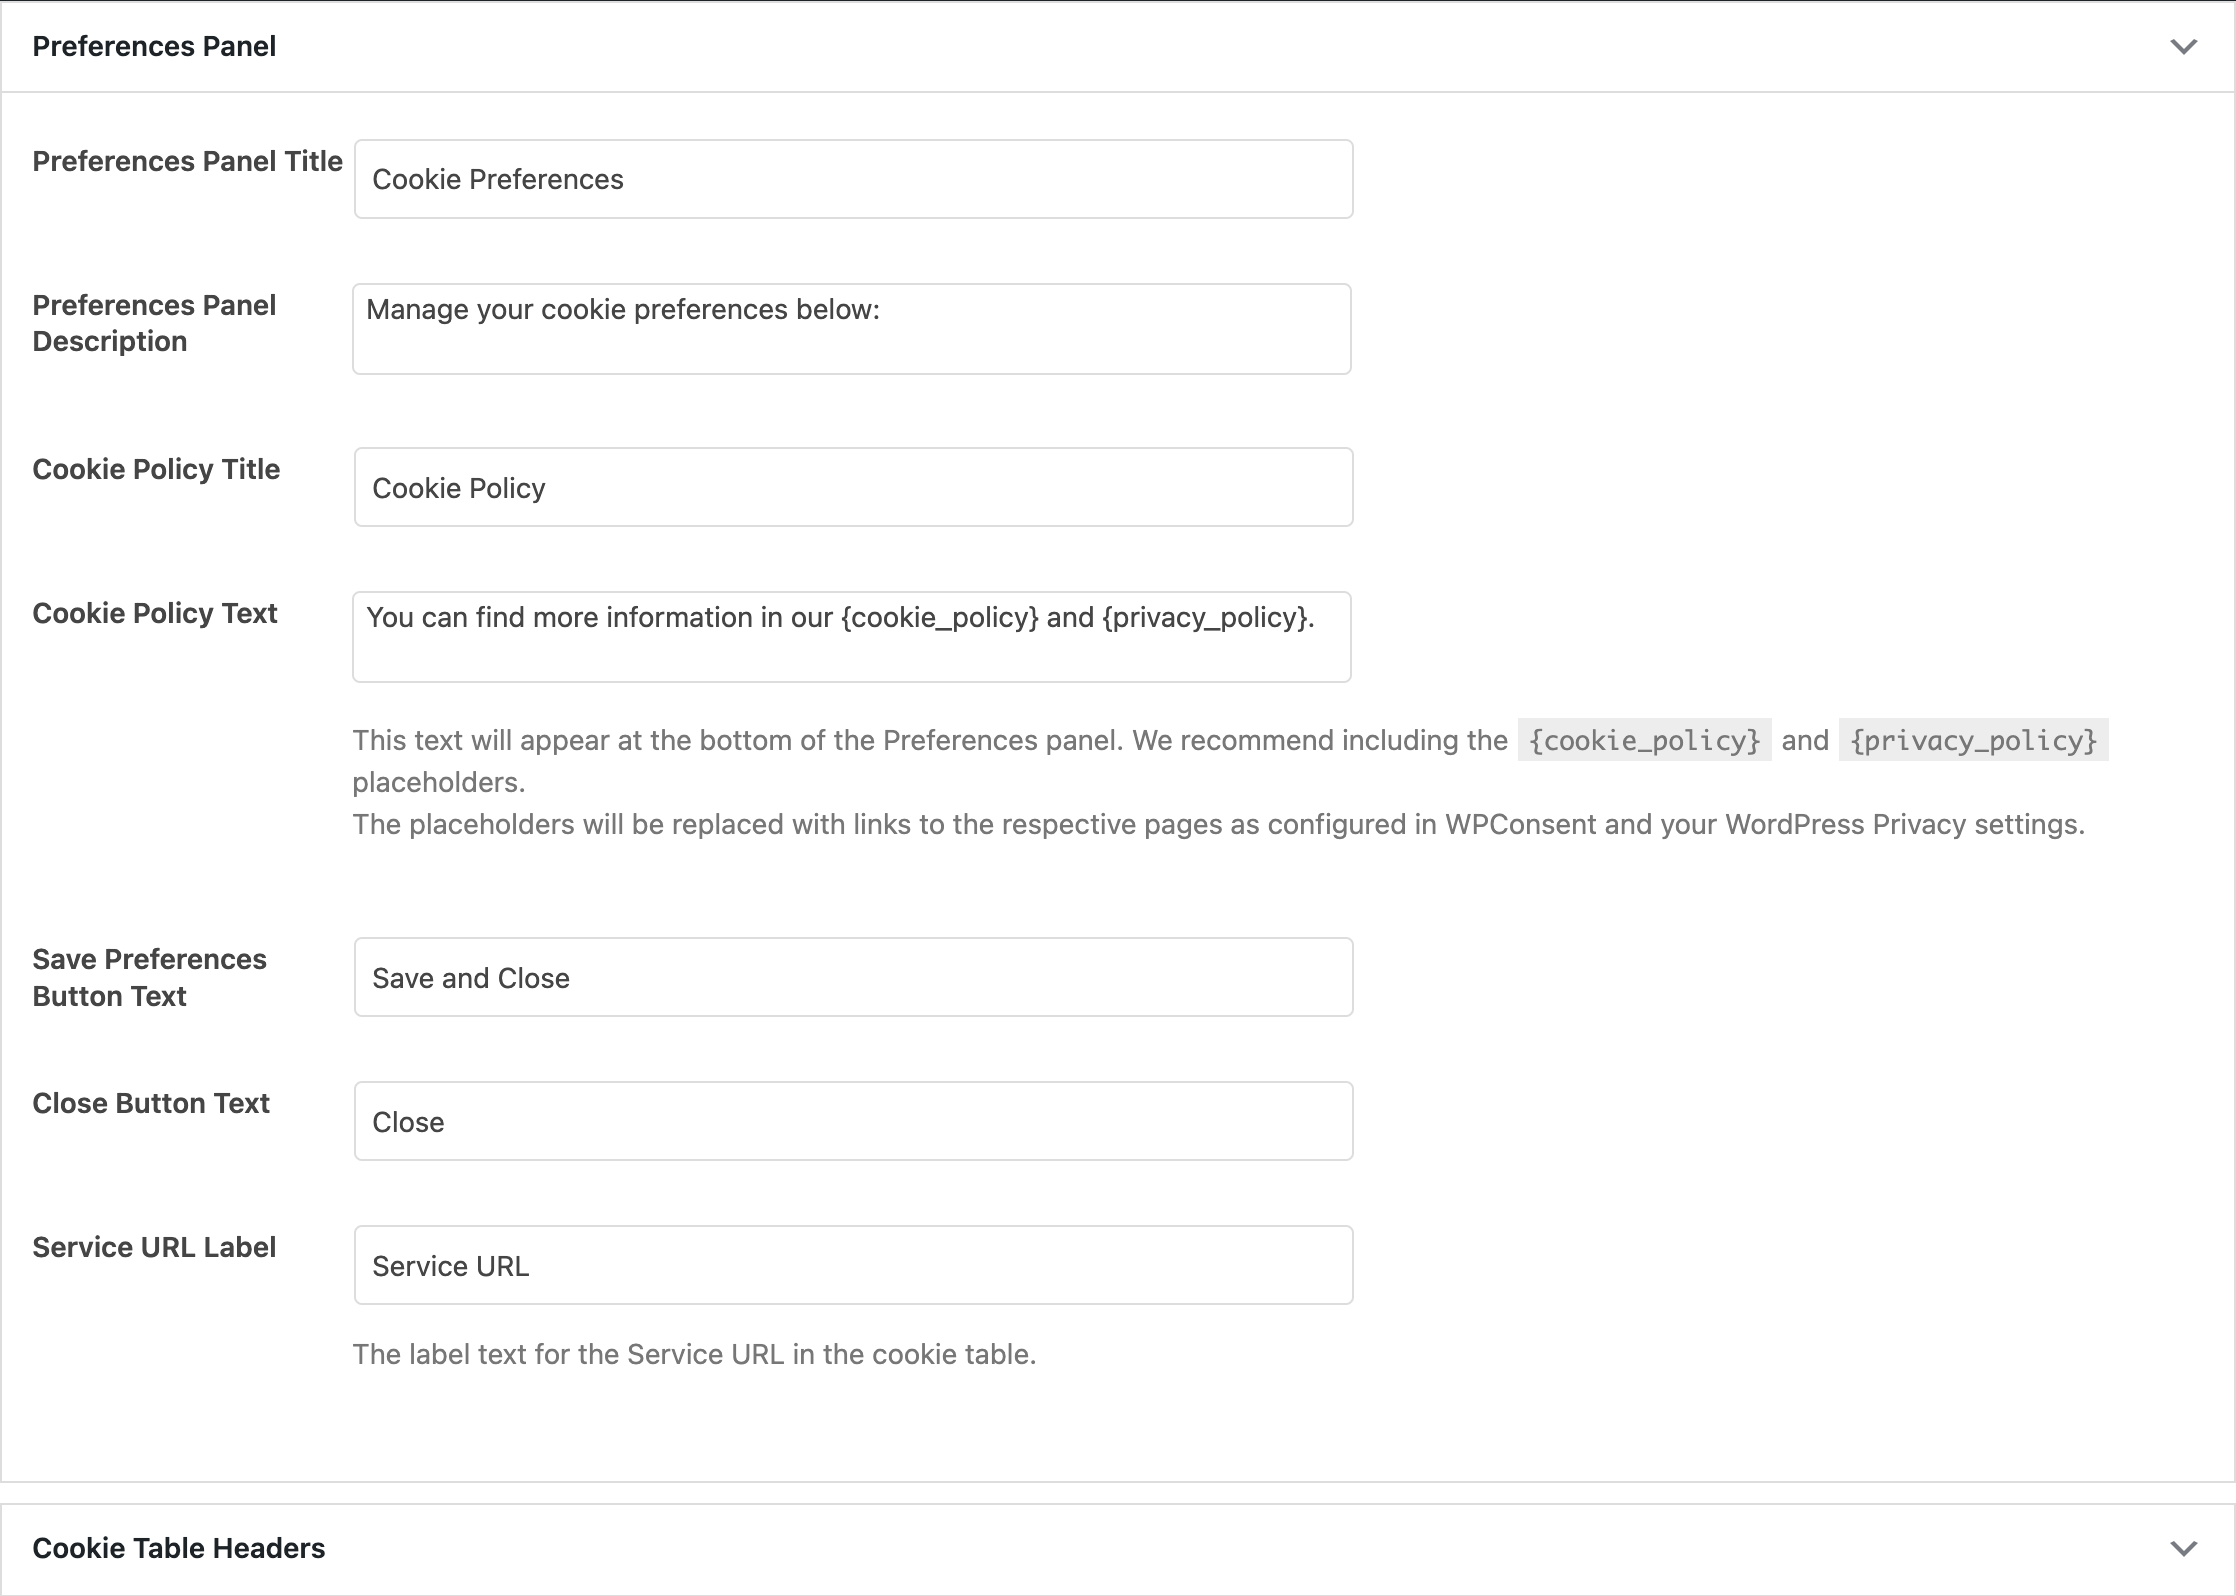
Configuring the preferences panel
The Preferences Panel Settings section appears below the banner button options. To access these fields, expand the Preferences Panel accordion.
Here are all the fields available inside this accordion:
Preferences panel title
This text input sets the heading of the preferences panel. The default value is:
Cookie Preferences
Preferences panel description
This text area sets the introductory text below the title. The default value is:
Manage your cookie preferences below:
Cookie policy title
This text input controls the heading shown above the cookie policy text. The default value is:
Cookie Policy
Cookie policy text
This text area controls the policy text at the bottom of the preferences panel. The default value is:
You can find more information in our {cookie_policy} and {privacy_policy}.
This field supports 2 placeholders:
{cookie_policy}is replaced with a link to your cookie policy page as configured in WPConsent >> Settings >> Cookie Policy.{privacy_policy}is replaced with a link to the privacy policy page set in Settings >> Privacy in WordPress.
We recommend including both placeholders so visitors can access your full policies directly from the preferences panel.
Save preferences button text
This text input controls the button visitors click to confirm their cookie choices. The default value is:
Save and Close
Close button text
This text input controls the close link in the preferences panel. The default value is:
Close
Service URL label
This text input sets the label for the service URL field in the cookie table. The default value is:
Service URL
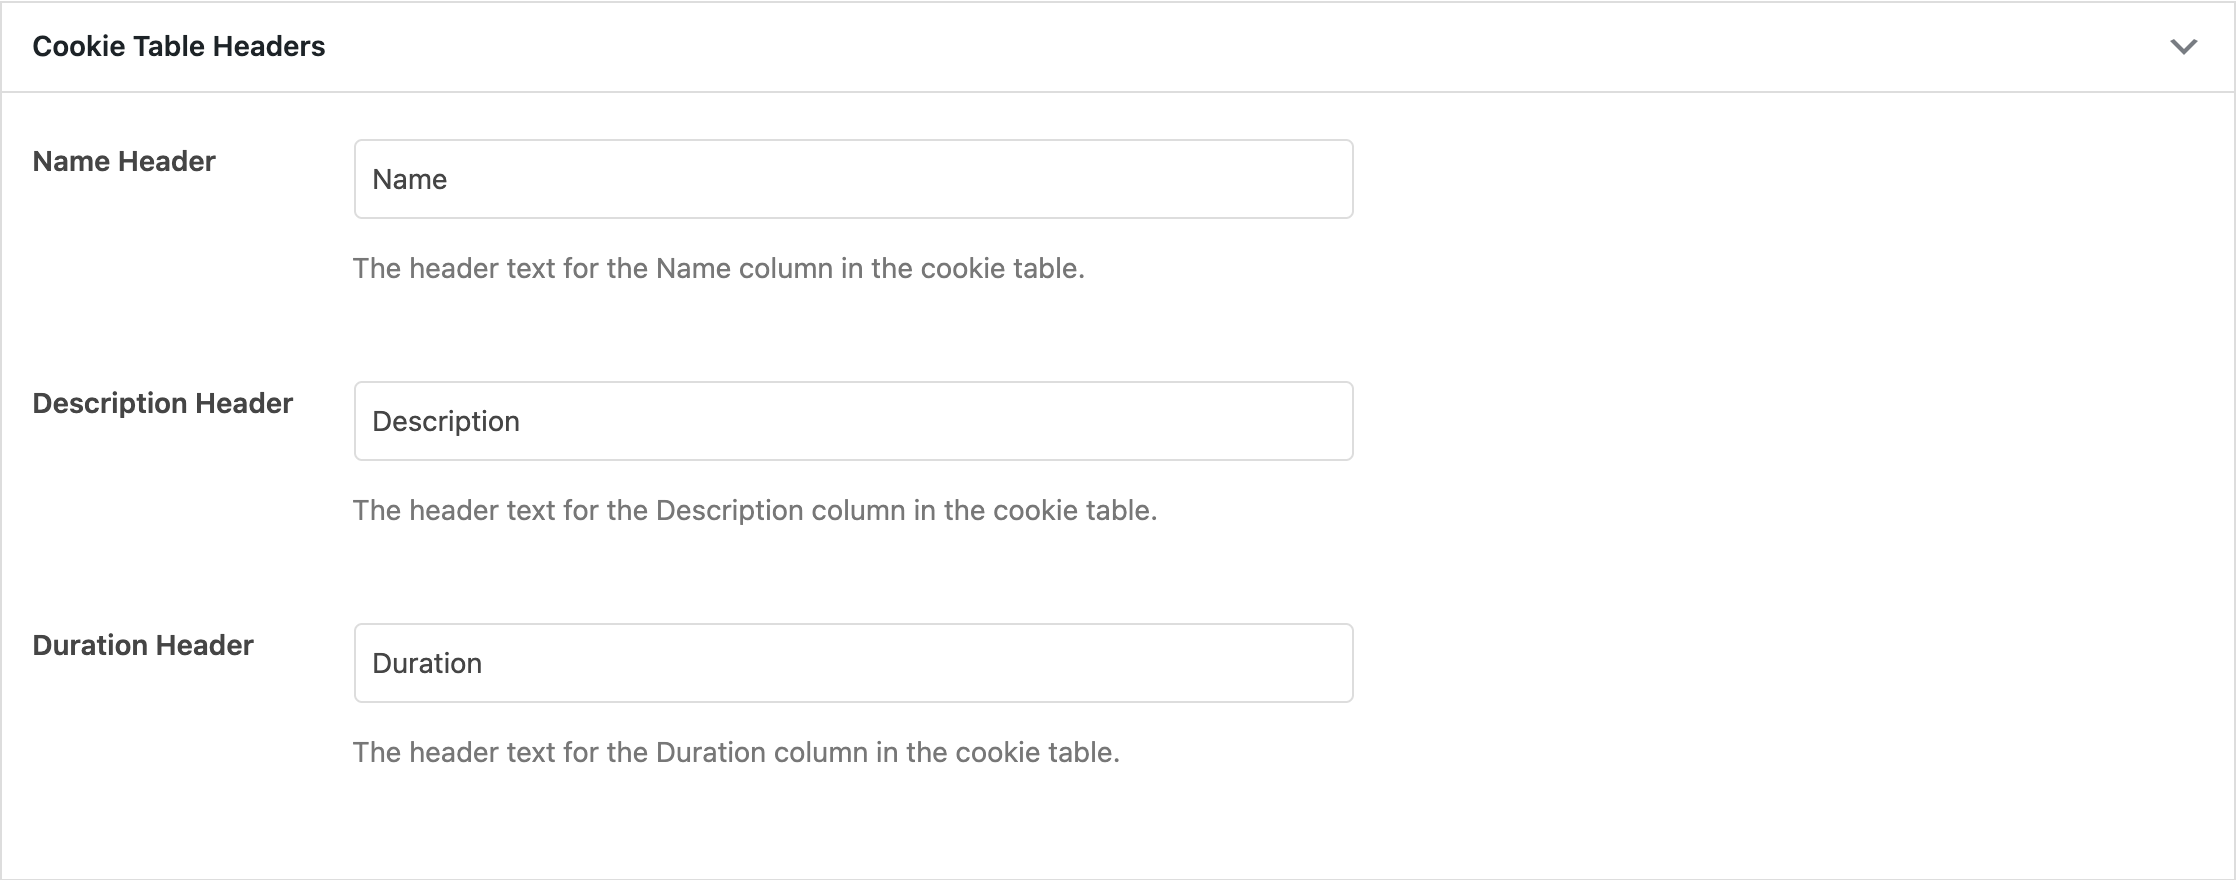
Customizing cookie table headers
Next, expand the Cookie Table Headers accordion to change the column headings in the cookie table within the preferences panel.
| Header | Default value |
|---|---|
| Name Header | Name |
| Description Header | Description |
| Duration Header | Duration |
These headers appear at the top of the cookie table for each cookie category in the preferences panel.
Configuring GPC messages
If you’ve enabled Respect GPC in the advanced settings, 2 additional fields appear inside the Preferences Panel accordion.
GPC honored message
This text input controls the toast notification shown when WPConsent honors a visitor’s Global Privacy Control signal. The default value is:
GPC Signal Honored
GPC override message
This text area controls the acknowledgment message visitors see when they override their GPC preferences. The default value is:
I understand GPC will be overwritten and want to allow this site to sell or share my personal information anyway
These fields only appear when the Respect GPC setting is enabled in the advanced settings tab.
Uploading a logo
The Logo/Icon field lets you upload or select an image from your media library. This image appears in the banner alongside the message text. Leave it empty if you don’t want a logo in the banner.
Hiding the powered by link
The Hide Powered By toggle removes the “Powered by WPConsent” link from the banner on the frontend. Turn it off if you want to keep the attribution link visible.
Saving and enabling the banner
At the bottom of the Content tab, a Show Banner on Frontend checkbox is checked by default. Uncheck it if you want to save your content changes without displaying the banner to visitors.
Finally, click Save to store your changes. All text changes take effect immediately on the frontend.
Verifying your setup
- Open your site in a new incognito or private browser window.
- Confirm the banner displays your custom message and button labels.
- Click the preferences button and verify the preferences panel title, description, and cookie policy text appear correctly.
- Check that the
{cookie_policy}and{privacy_policy}placeholders resolve to working links. - Verify the cookie table headers match your custom text.
FAQ
Why aren’t my changes showing on the frontend?
Clear any page cache or CDN cache your site uses. WPConsent outputs the banner text directly, but server-side caches can serve stale HTML. Also confirm the Show Banner on Frontend checkbox was checked when you saved.
Why do my placeholders show as raw text instead of links?
The {cookie_policy} placeholder requires a cookie policy page set under WPConsent >> Settings >> Cookie Policy. The {privacy_policy} placeholder requires a privacy page configured in Settings >> Privacy in WordPress. If either page isn’t configured, the placeholder is removed and nothing is displayed in its place.
Why can’t I see the GPC fields?
The GPC message fields only appear when Respect GPC is enabled in the Advanced tab under WPConsent >> Settings. Enable it there first, then return to the Content tab.
Why didn’t my button order save?
Make sure you drag buttons using the handle icon on the left side of each row. Dragging from other parts of the row doesn’t trigger the reorder. After reordering, click Save to persist the new order.
Conclusion
You’ve now customized all the text in your consent banner and preferences panel. Every label, message, and heading reflects your site’s tone and legal requirements. For your next step, learn how to customize your banner’s visual appearance if you haven’t already.